Visual Studio Code (VS Code) - Getting Started with C/C++
This tutorial consists of both an article and a video.
In this guide, you will configure VS Code on Windows for C/C++ development using the GCC compiler (gcc/g++) and the GDB debugger from UCRT64.
Once the setup is complete, you will build and debug a simple Hello World program inside VS Code. This article does not teach GCC, GDB, UCRT64, or the C/C++ languages themselves. There are plenty of good resources for those topics.
This tutorial is long, but if you follow it carefully from start to finish, getting started with VS Code and C/C++ will be much easier.
1. Prerequisites
To complete this tutorial successfully, work through the following steps first:
-
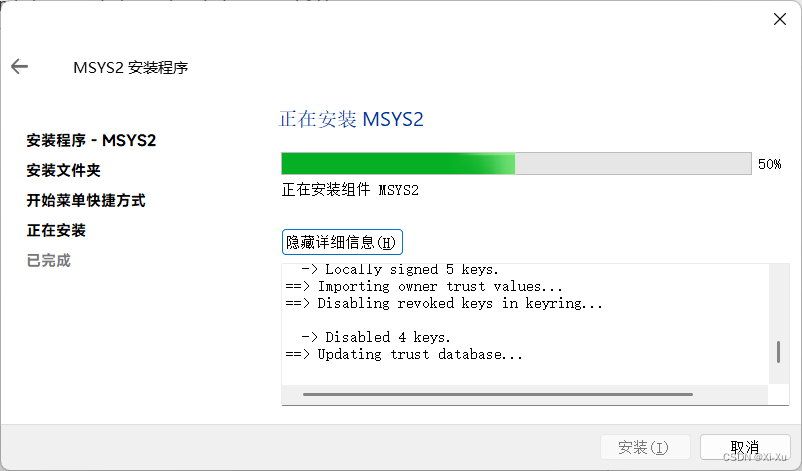
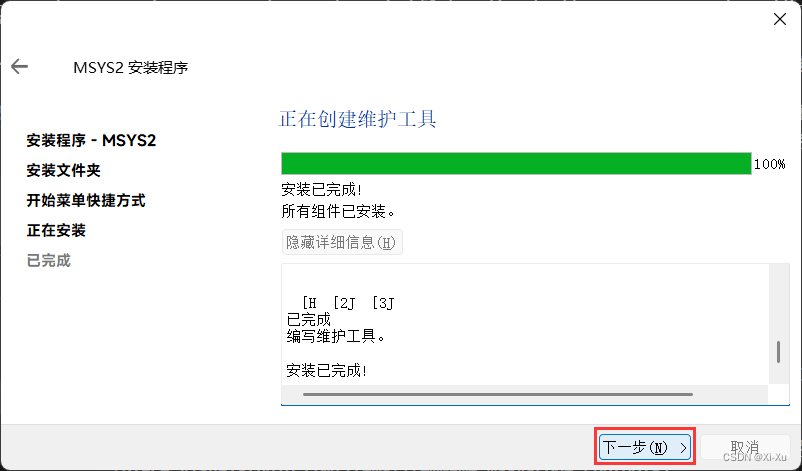
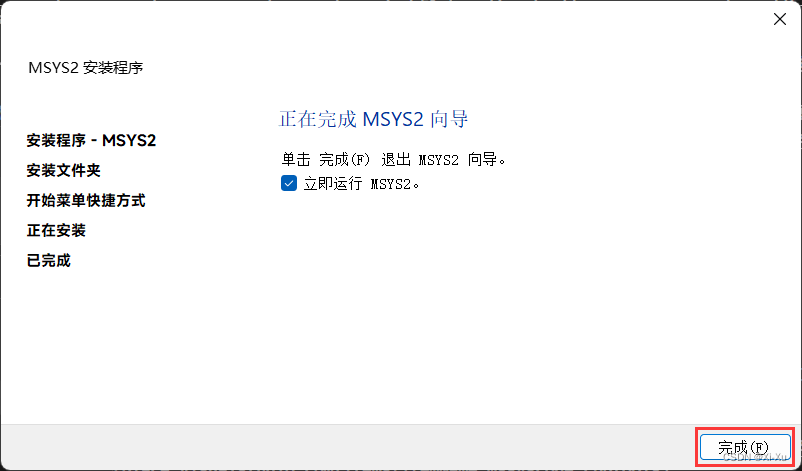
Install the latest UCRT64 toolchain through MSYS2. It provides current native builds of GCC, UCRT64, and many other useful tools and libraries for C/C++. Follow the Installation instructions on the MSYS2 website. If the official installer is too slow to download, you can also use this mirror. Installing MSYS2 may take a while because it refreshes package databases.
-
Install the UCRT64 toolchain. After MSYS2 is ready, a UCRT64 terminal opens. Run the following commands in order and accept the defaults so every member of the toolchain group gets installed:
pacman -Suy
pacman -S tar make
pacman -S mingw-w64-ucrt-x86_64-toolchain
pacman -Suy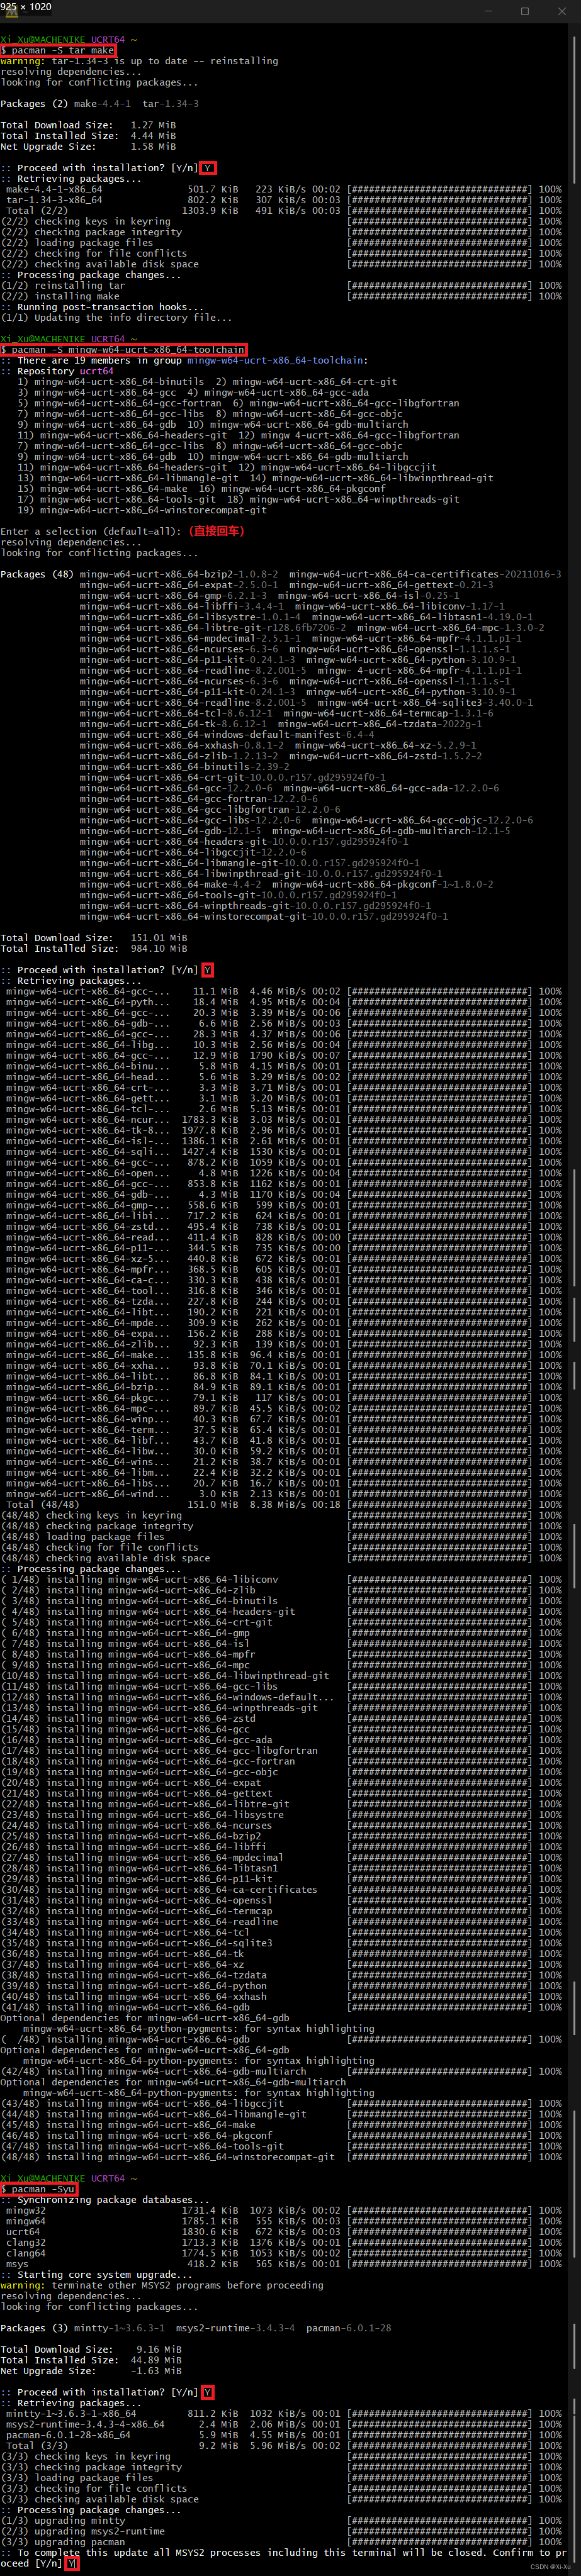
-
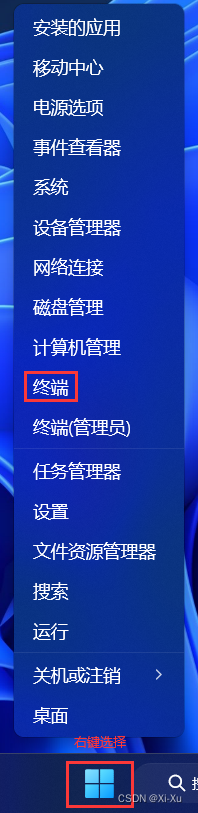
Add the UCRT64
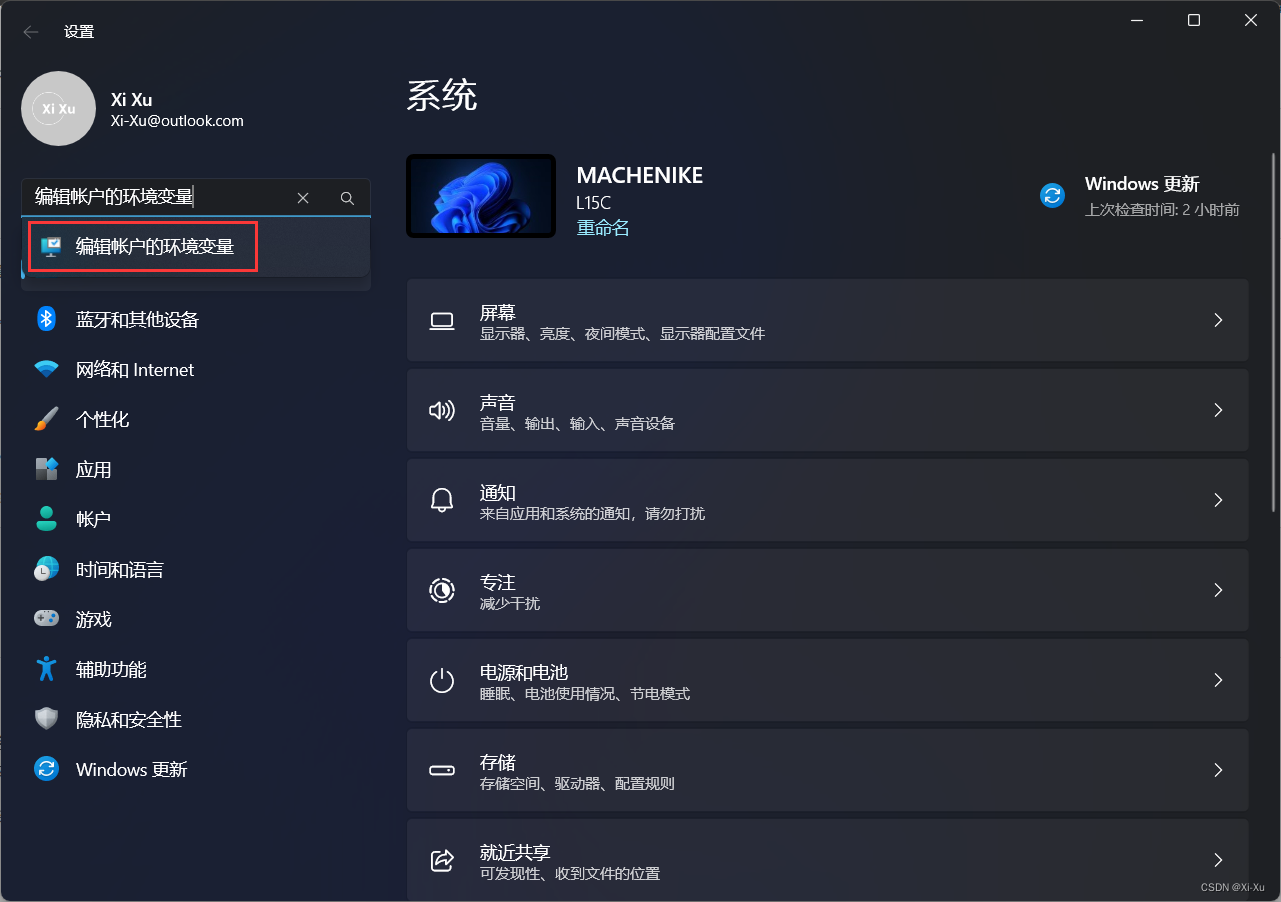
binfolder to your Windows environment variables:- Open Windows Settings from the search bar.
- Search for Edit environment variables for your account.
- Under system variables, select
Path, then click Edit.
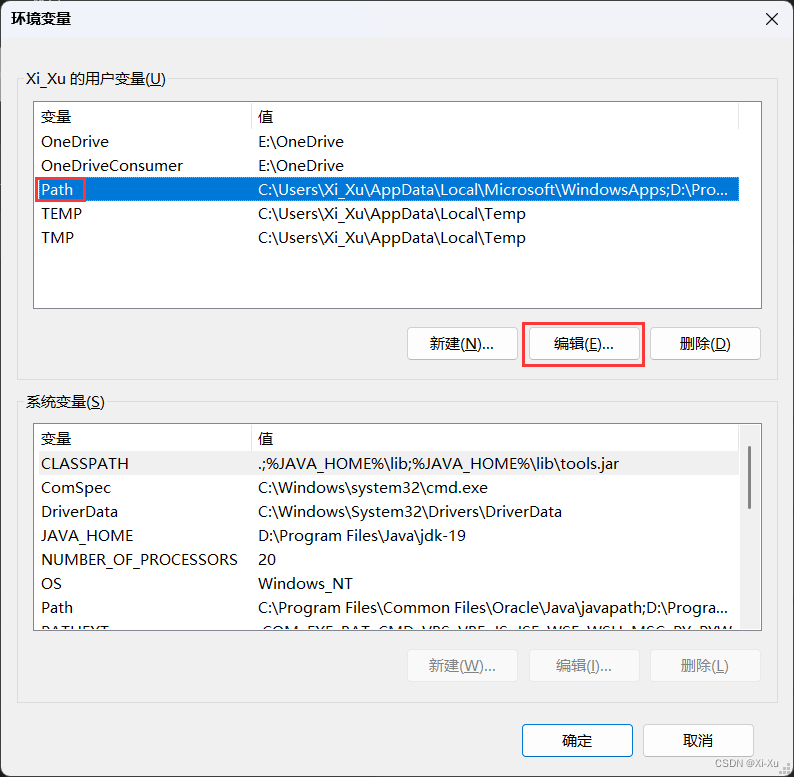
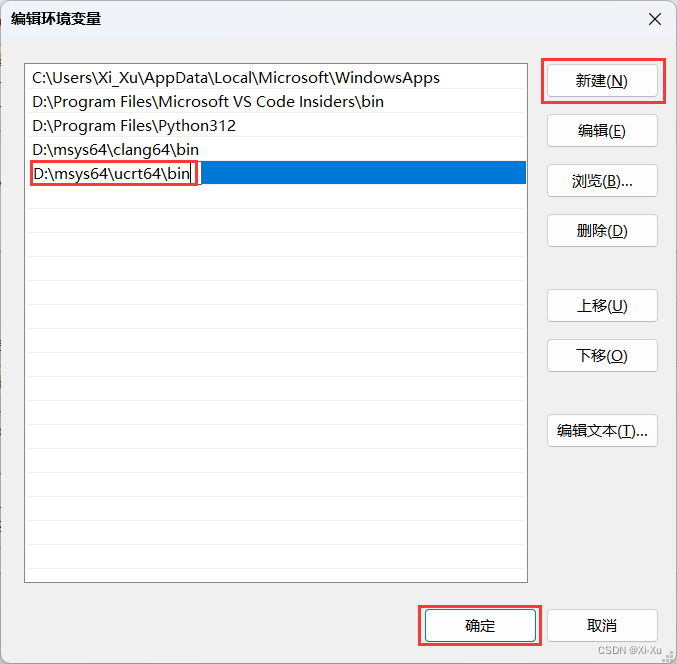
- Click New and add the UCRT64 target folder. If you used the default MSYS2 path, add
C:\msys64\ucrt64\bin. Click OK to save the change.
-
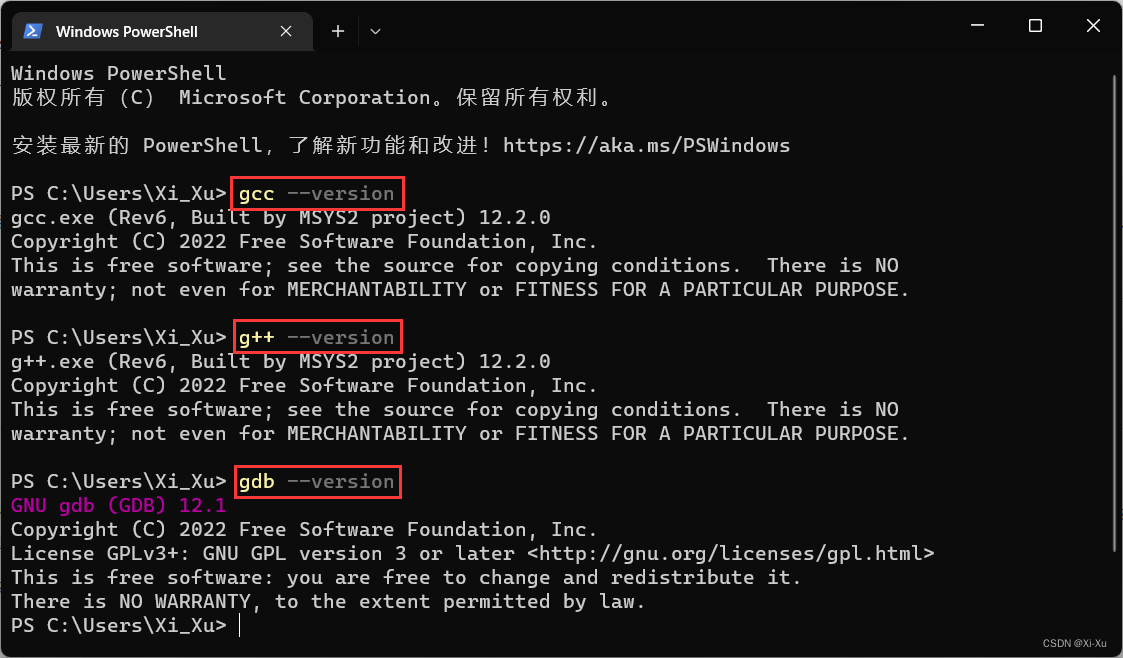
Verify that the UCRT64 tools are installed and available. Open a new terminal and run:
gcc --version
g++ --version
gdb --version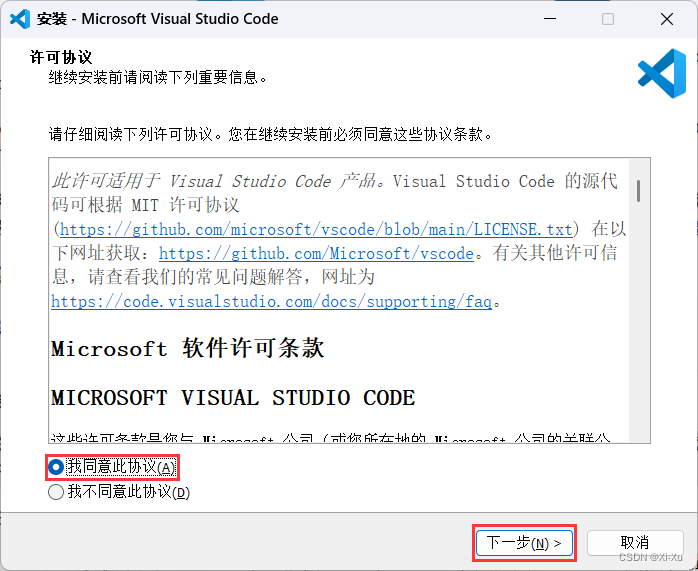
-
Download and install VS Code from the official download link. If the download is slow, you can also use this mirror. Run the installer, accept the license, keep clicking Next, select every option on the Select Additional Tasks screen, and then click Install.
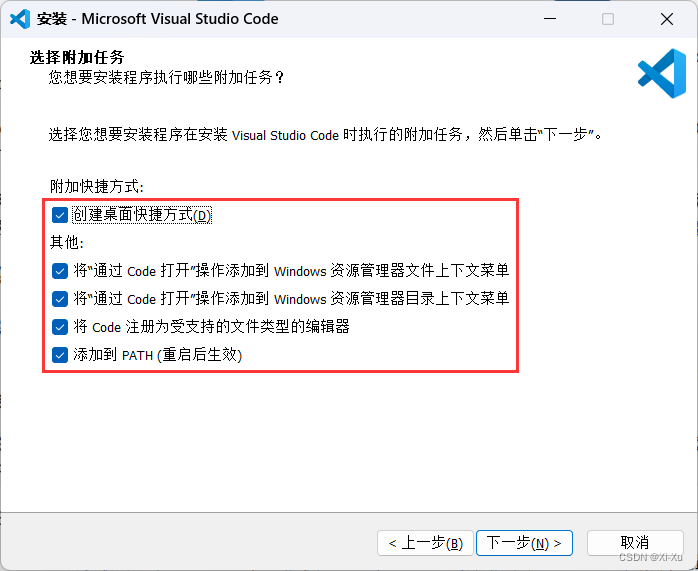
Tip: the installer adds VS Code to your
PATH, so later you can typecode .in a terminal to open the current folder in VS Code. After installation, restart your terminal so the environment variable changes take effect. -
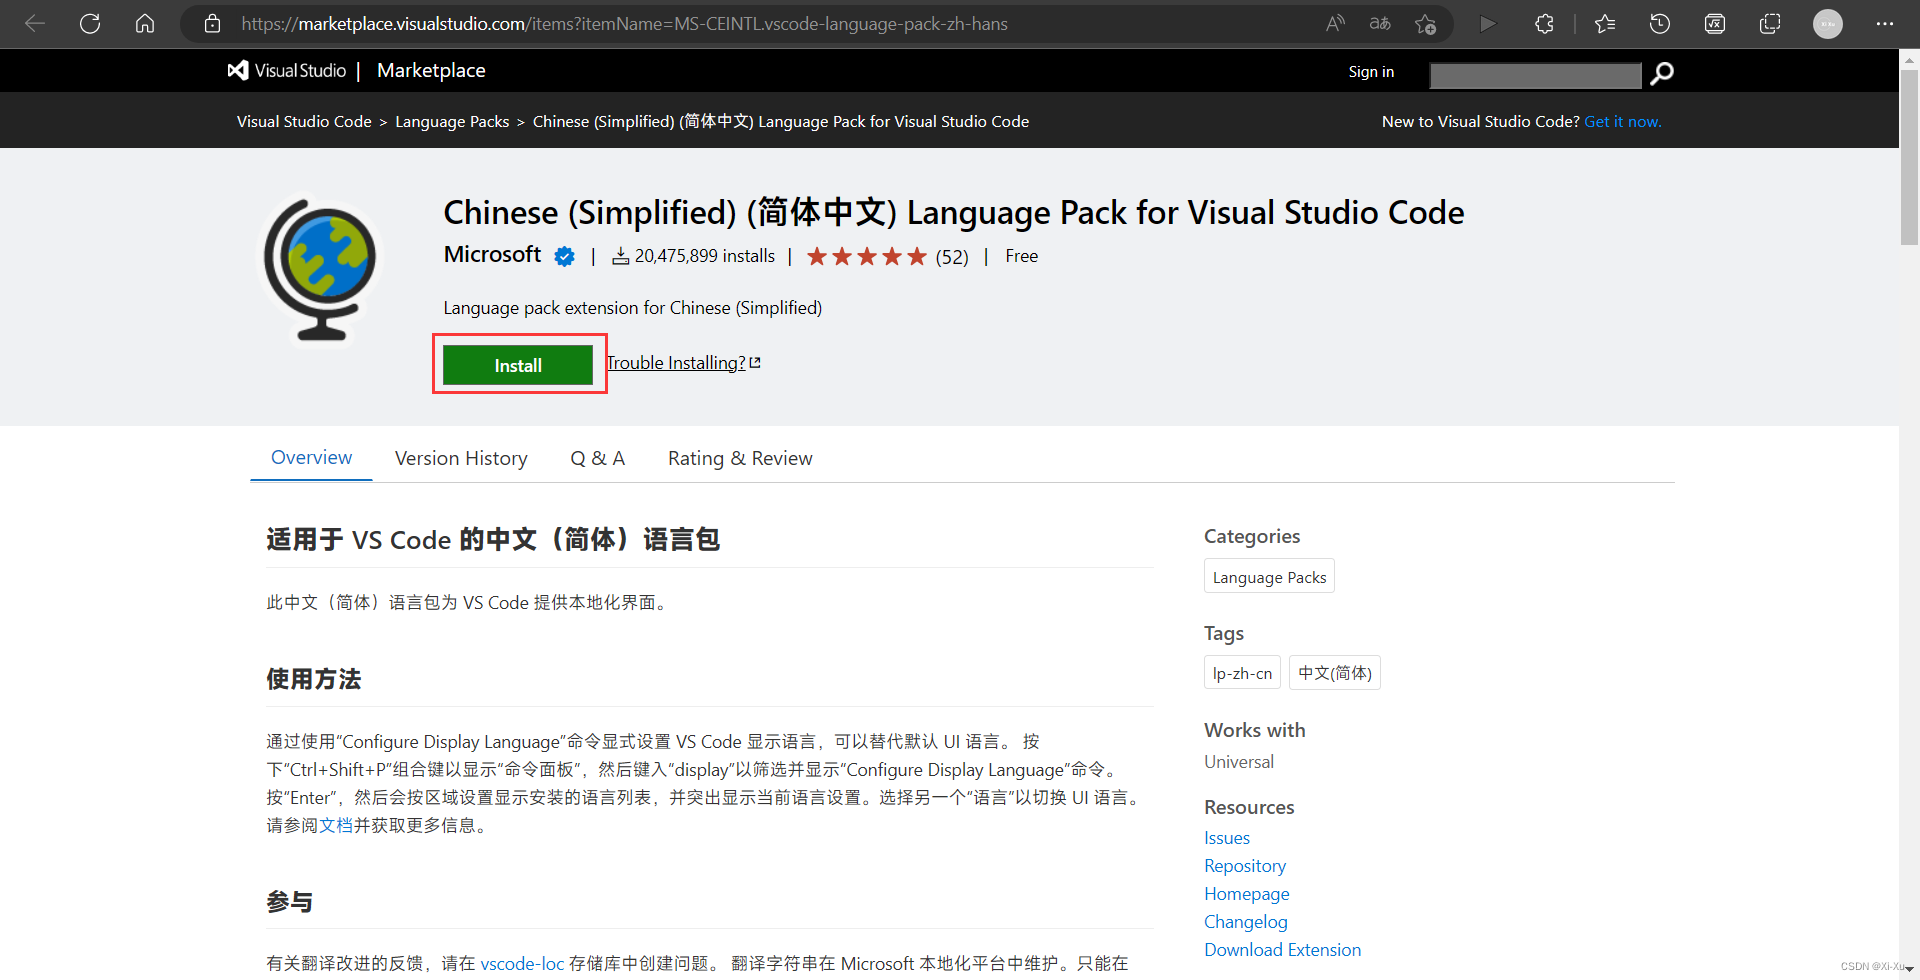
Install the required extensions. To match the screenshots in this article, install the Chinese (Simplified) Language Pack for Visual Studio Code and C/C++.
2. Create Hello World
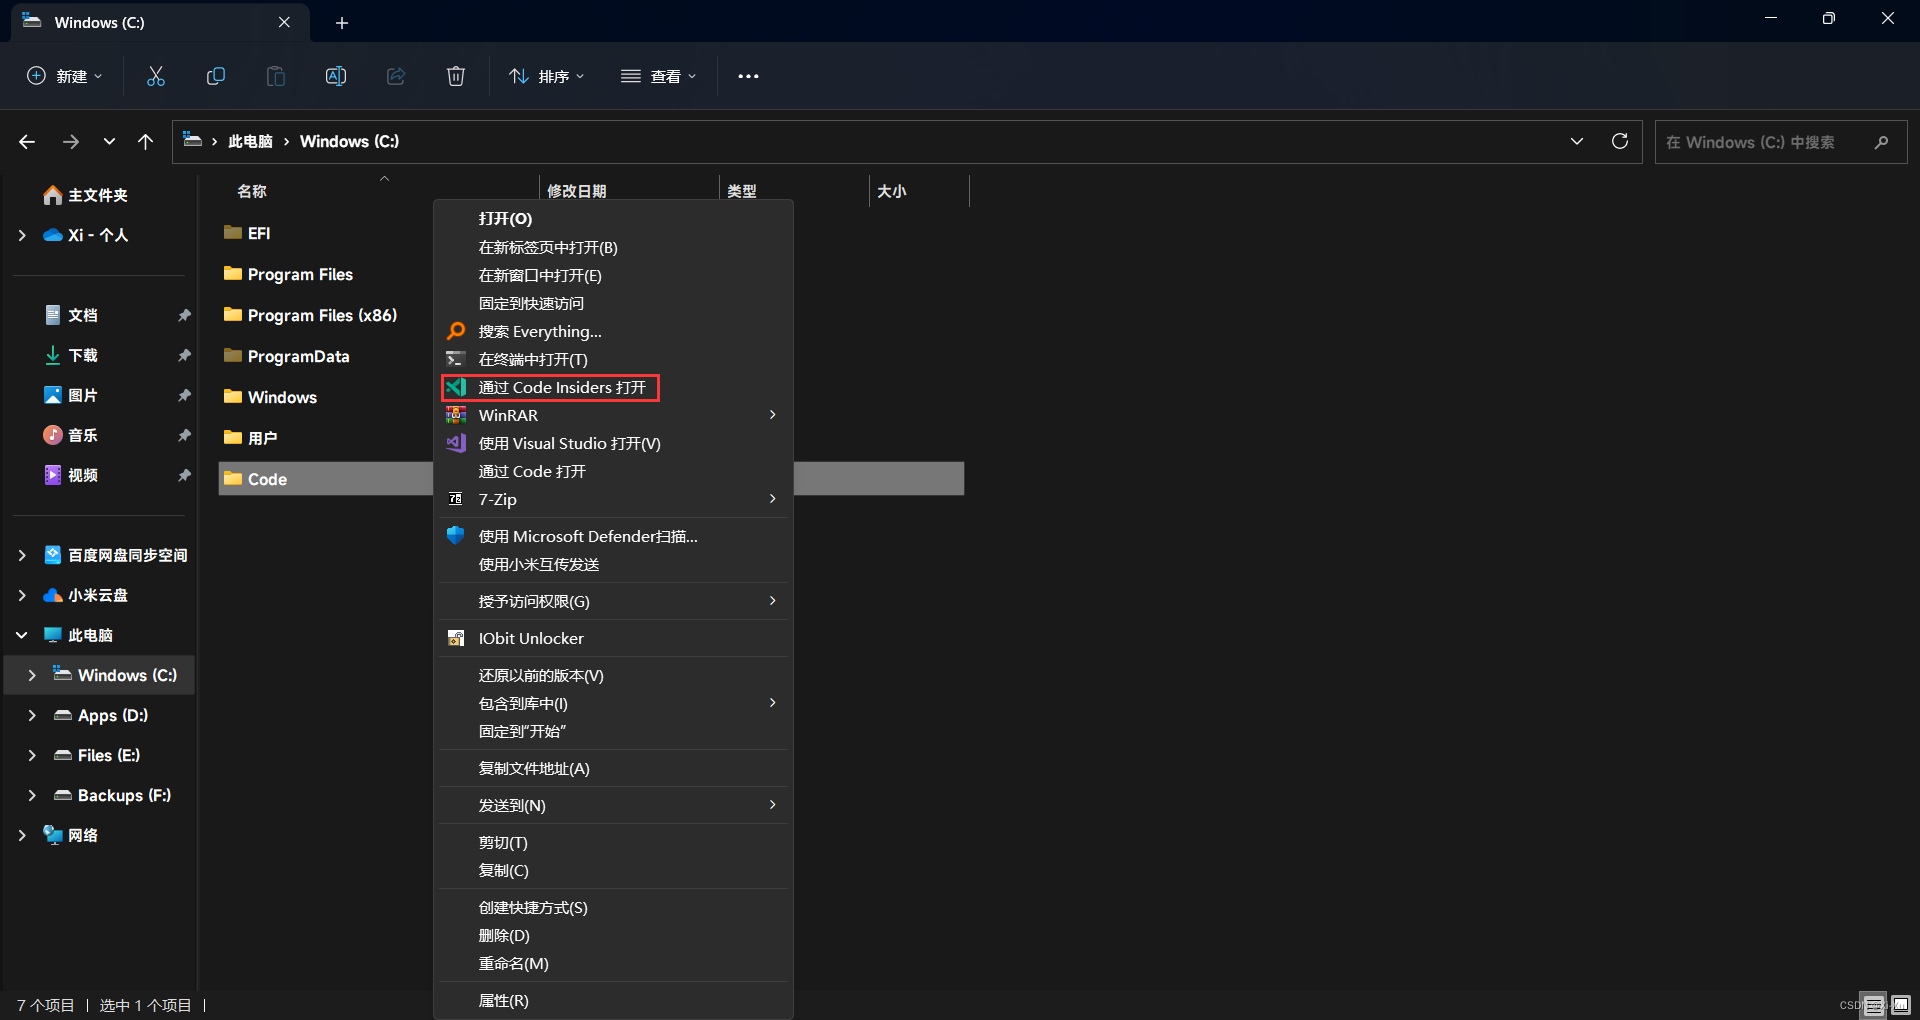
Create an empty folder anywhere on disk to hold your C/C++ code. Open that folder in VS Code, for example by right-clicking it and choosing Open with Code. This folder becomes your workspace. Accept the workspace trust prompt, because this is a folder you created yourself.
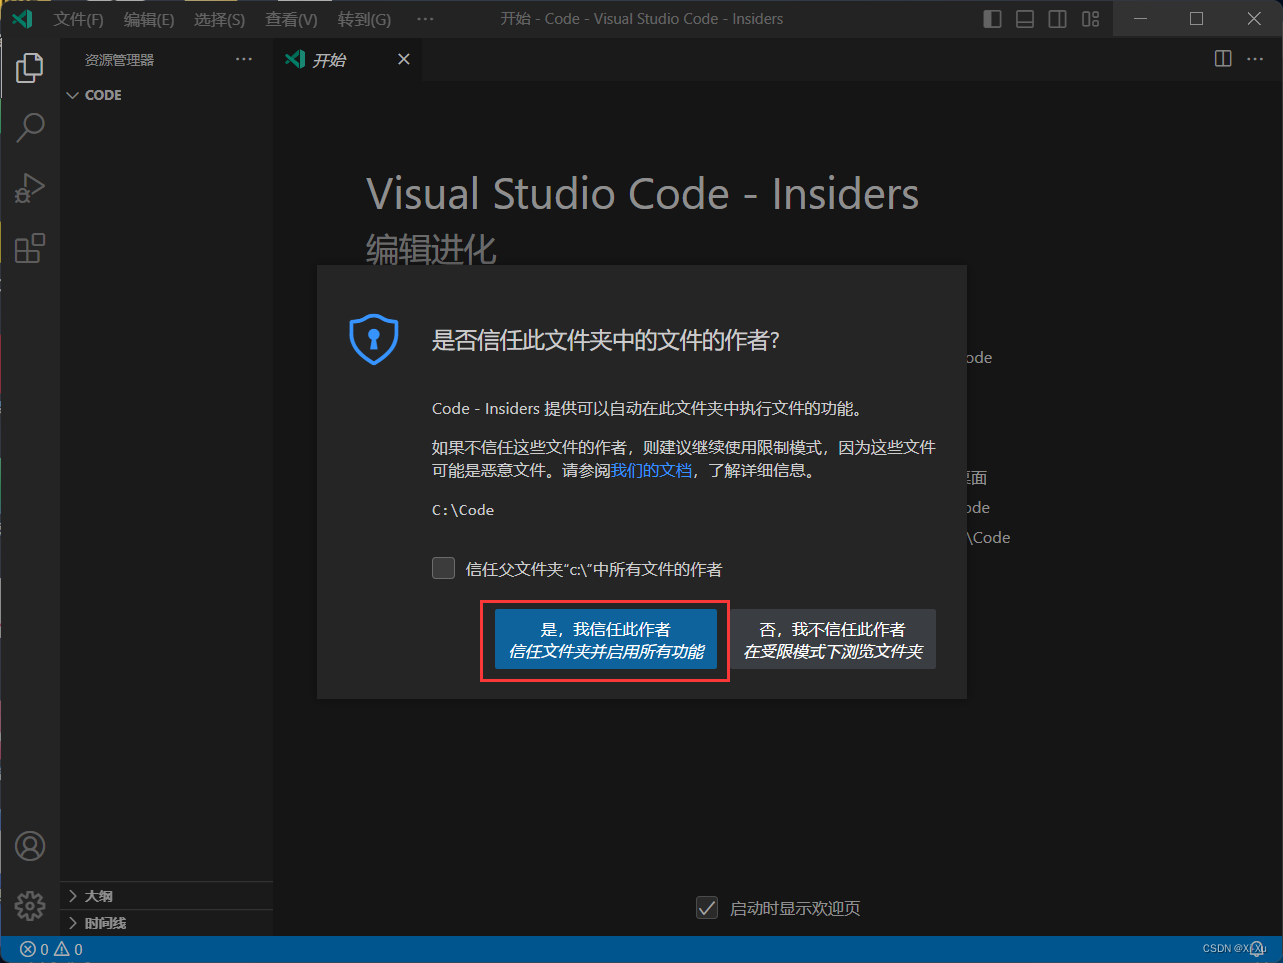
As you follow this tutorial, you will see a .vscode folder appear in the workspace together with three files:
launch.json (debugger configuration)
tasks.json (build configuration)
c_cpp_properties.json (C/C++ configuration)
2.1 Add a source file
In the Explorer title bar, click New File and name it either helloworld.c or helloworld.cpp.
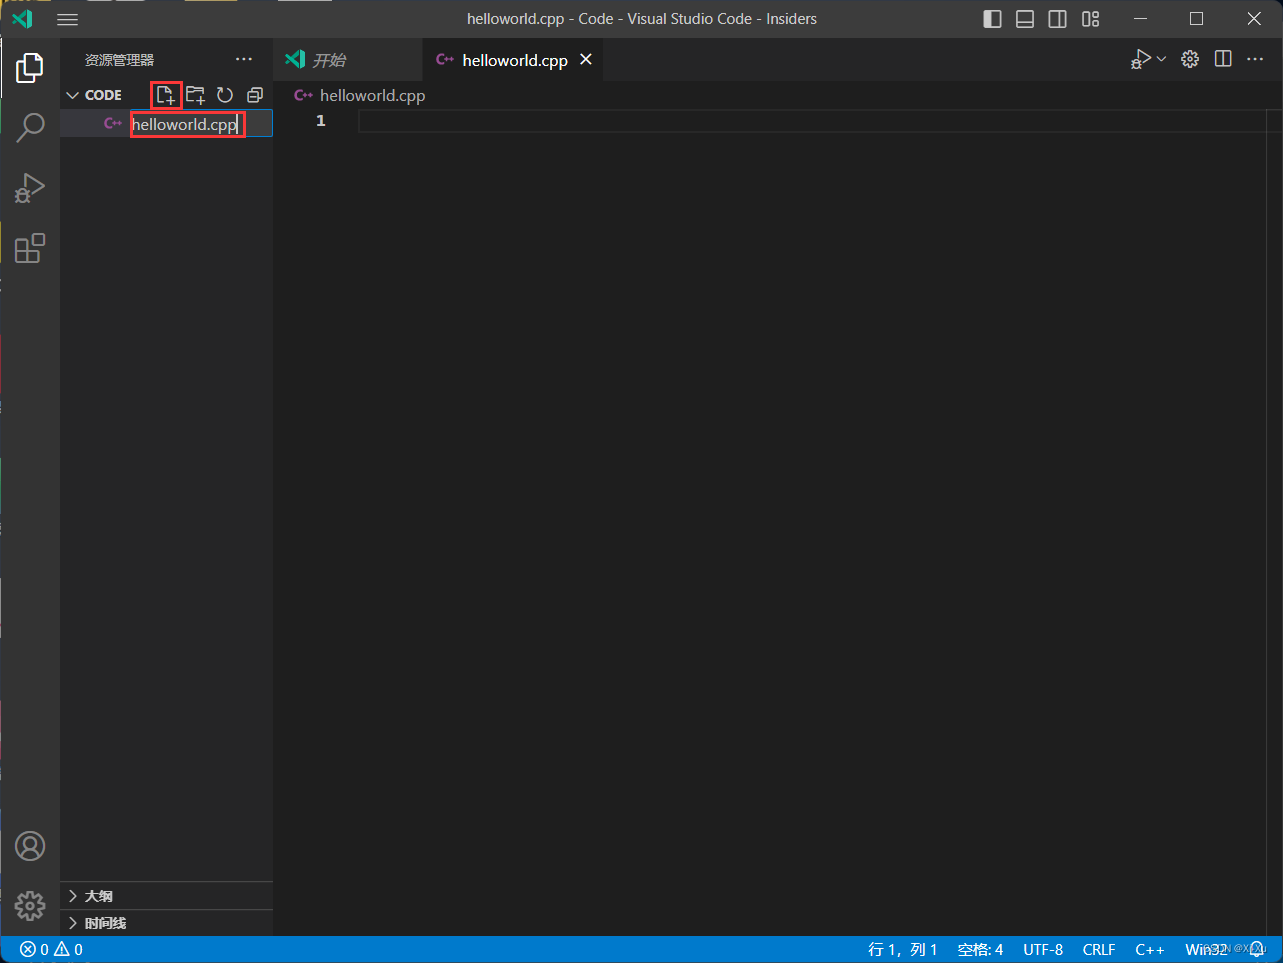
2.2 Add the Hello World source code
Copy this into helloworld.c:
#include <stdio.h>

int main()
{
    printf("Hello world!\n");

    return 0;
}
Or copy this into helloworld.cpp:
#include <bits/stdc++.h>

using namespace std;

int main()
{
    cout << "Hello world!" << endl;

    return 0;
}
Now save the file.
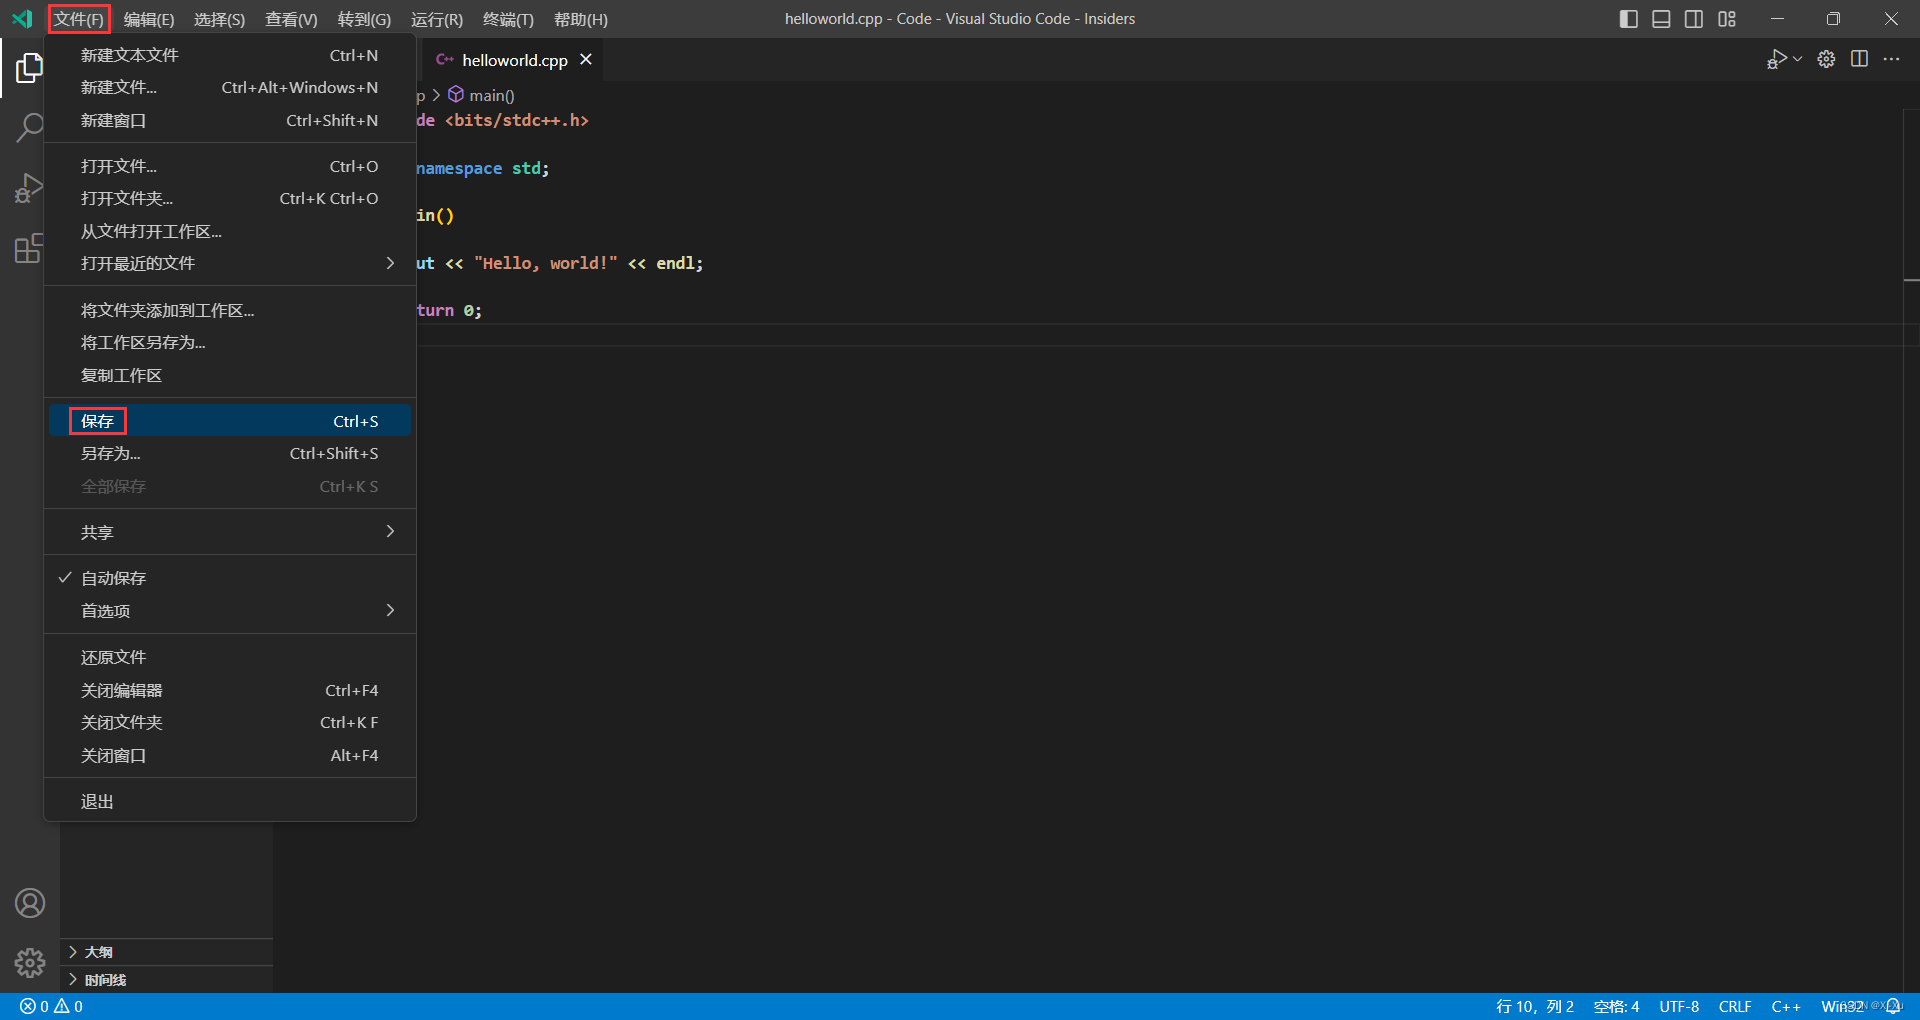
You can also enable Auto Save, which is covered later in More, item 2.
The activity bar on the far left lets you switch between different views such as Search, Run and Debug, and Extensions. We will use Run and Debug later. For more UI details, see the official VS Code user interface docs.
Note: when saving or opening C/C++ files, you may see notifications from the C/C++ extension about preview releases. You can safely ignore them by clearing the notifications.
2.3 Customize debugging with launch.json
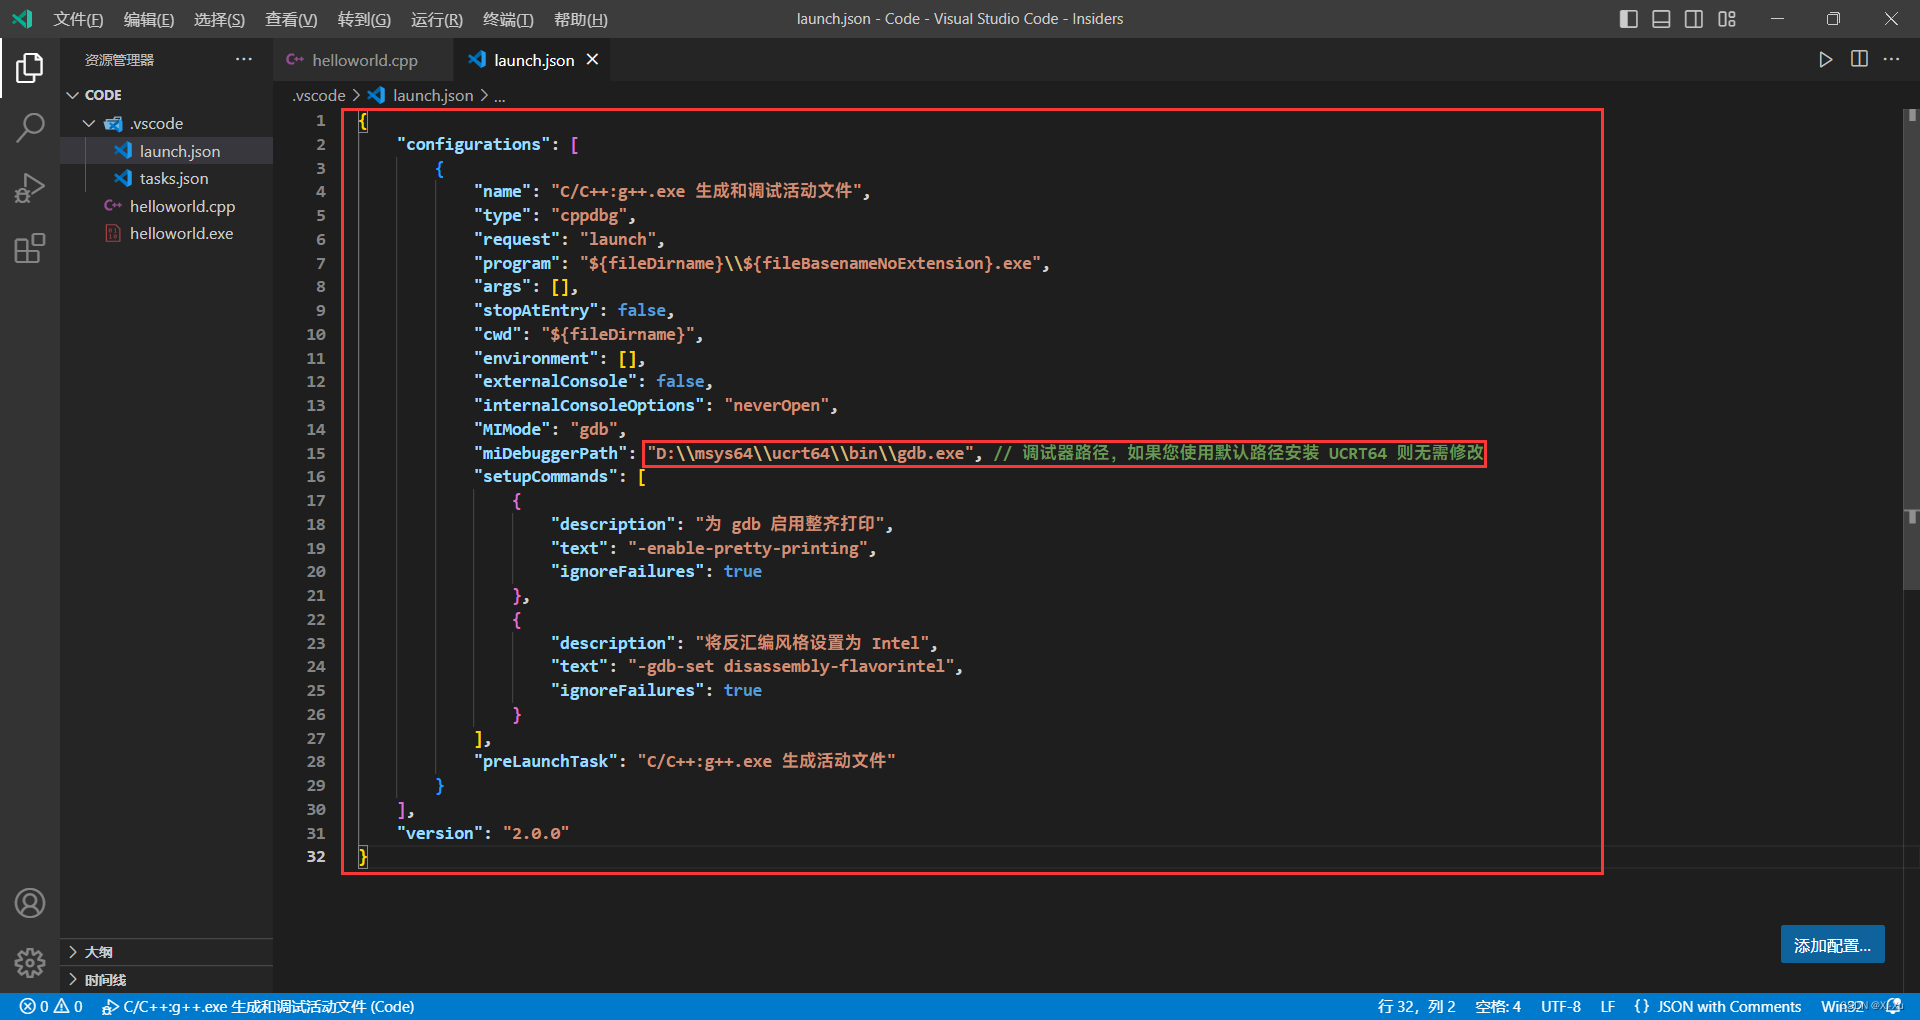
Click the Run and Debug setup button in the editor toolbar. From the predefined debug configurations, choose C/C++: gcc.exe build and debug active file for helloworld.c, or C/C++: g++.exe build and debug active file for helloworld.cpp.
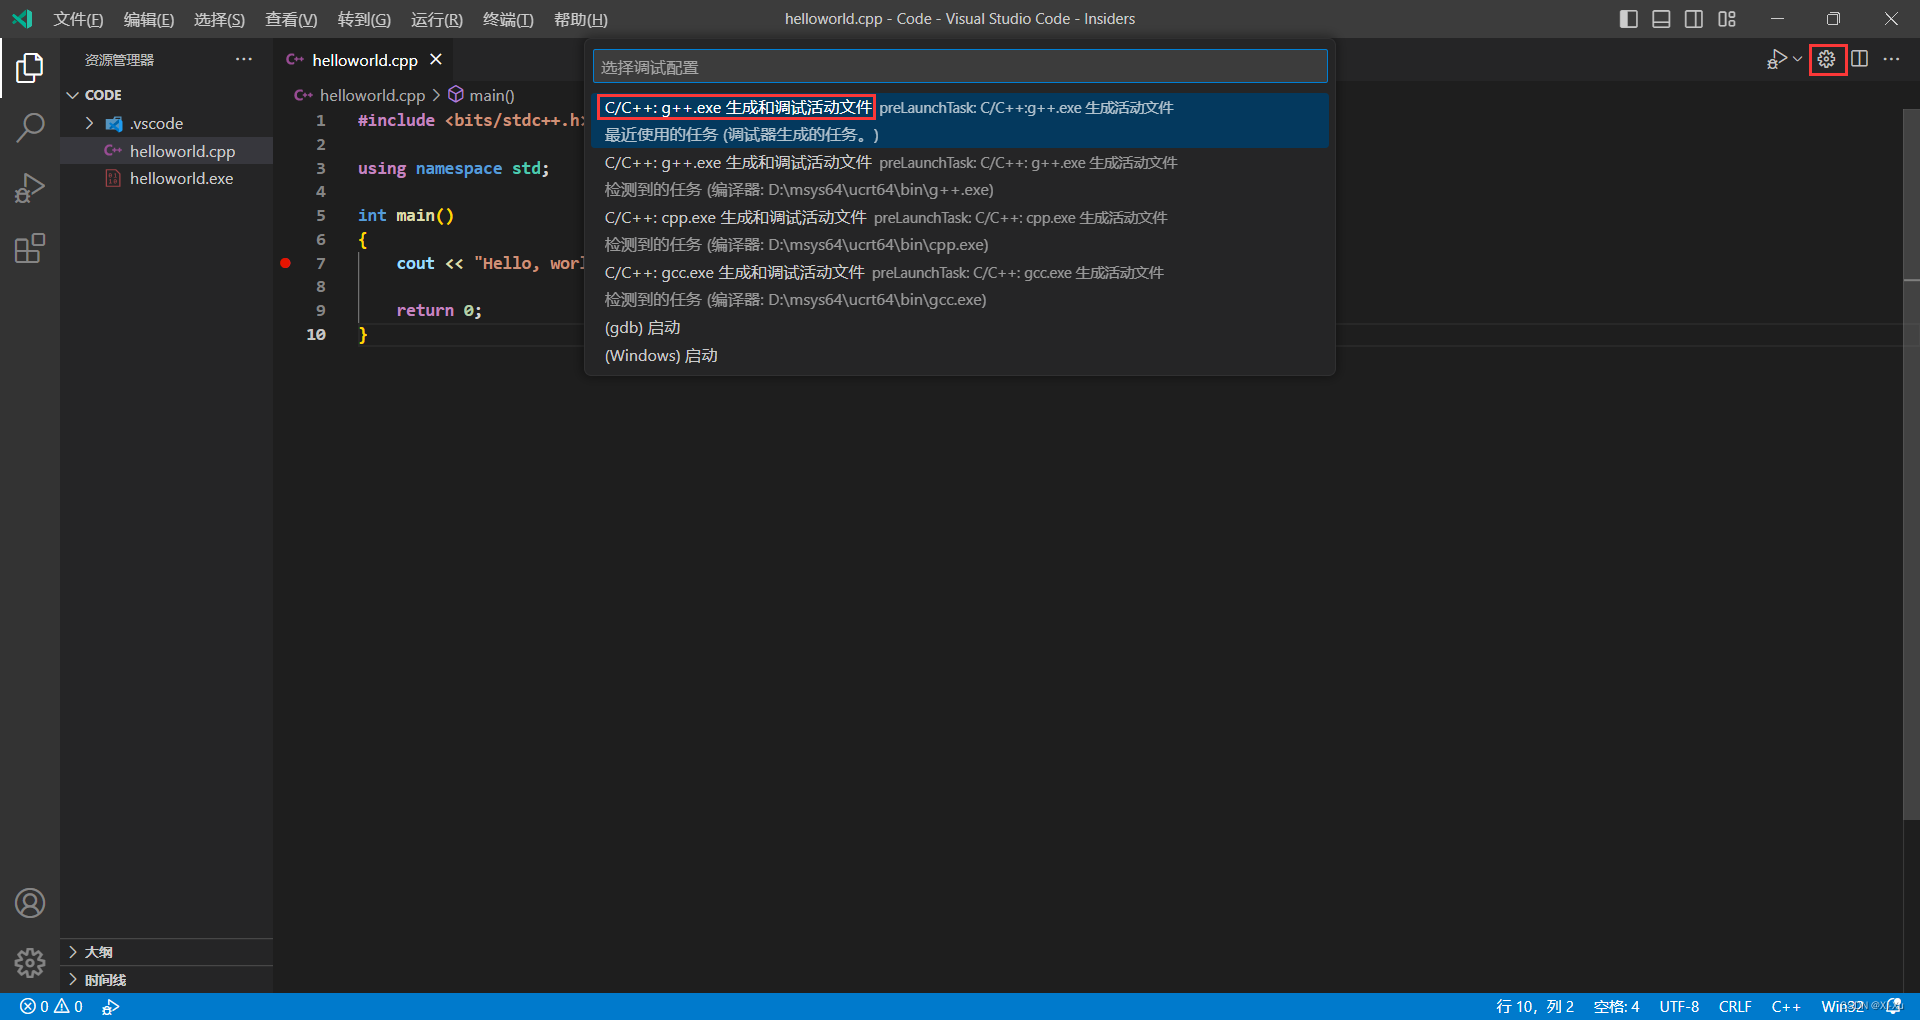
VS Code creates launch.json and tasks.json.
Add the following line to launch.json so the internal debug console does not pop open and execution stays in the integrated terminal instead:
"internalConsoleOptions": "neverOpen",
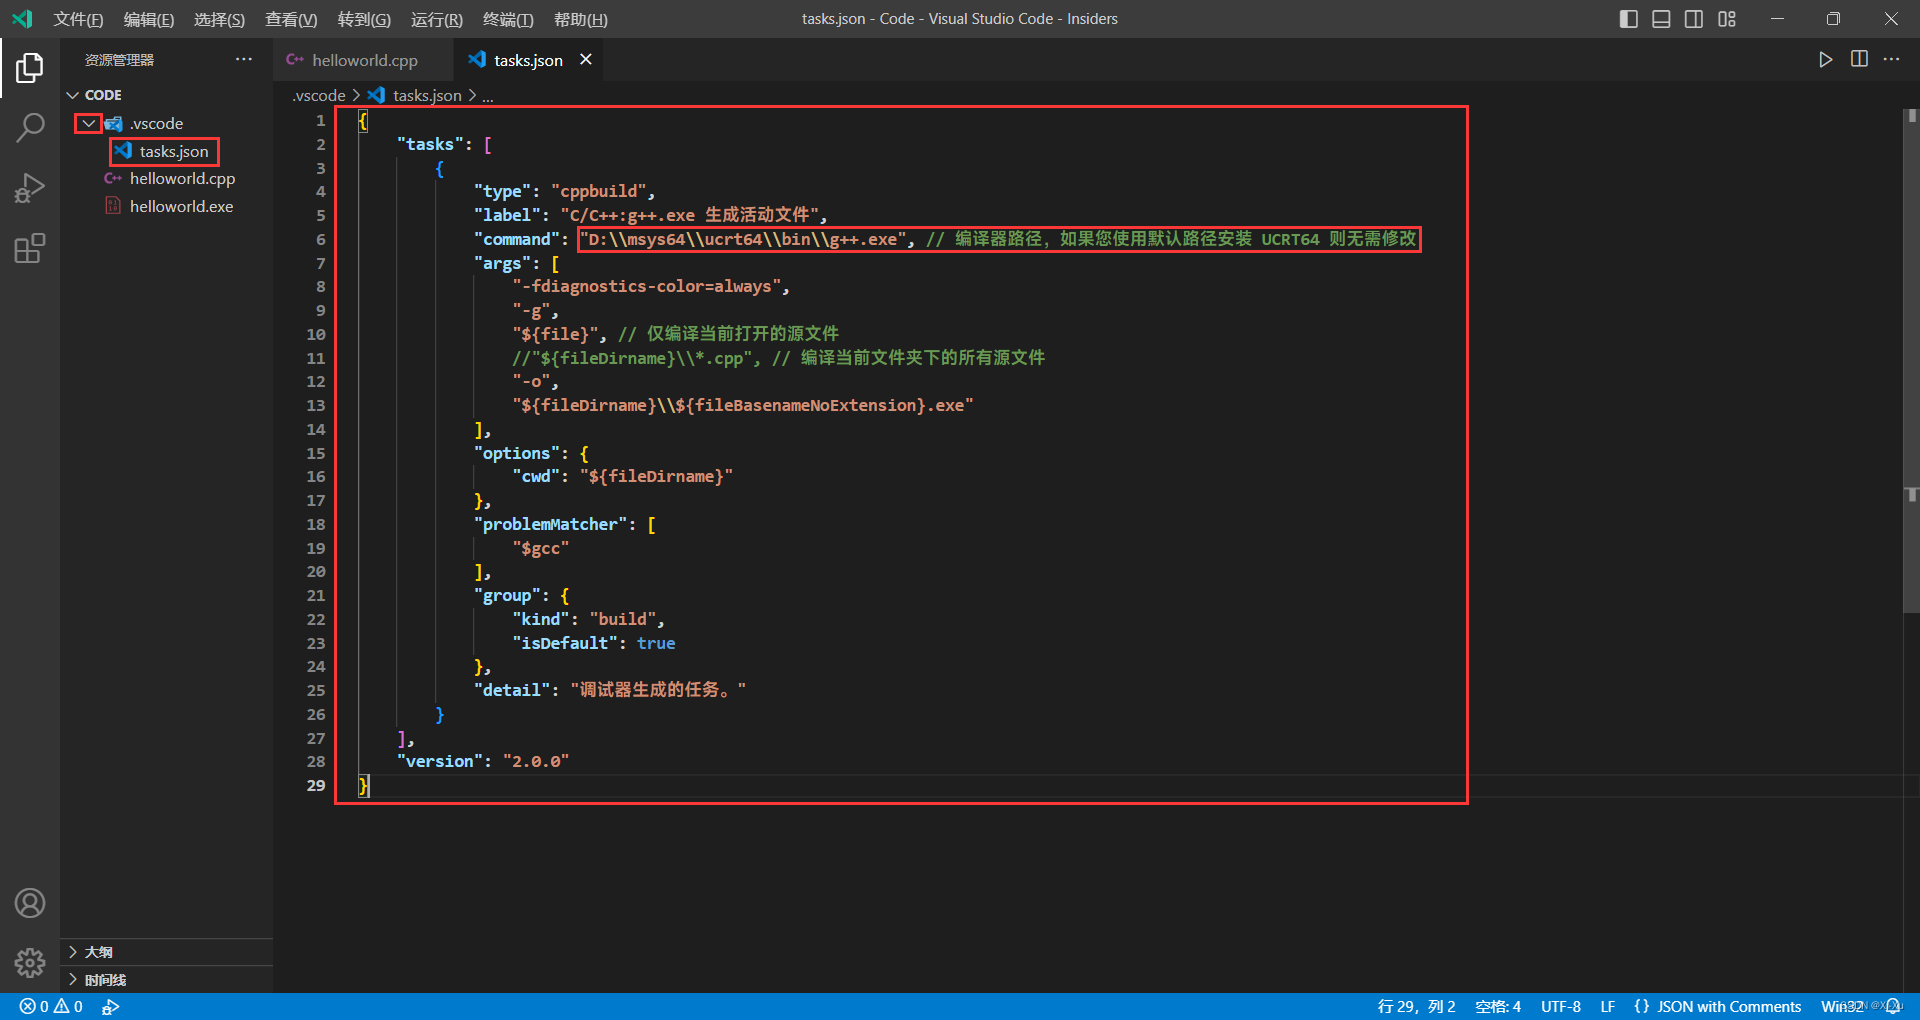
If you are building and debugging a C source file, replace line 10 of tasks.json with one of the following options, leaving only one enabled:
    "${file}", // Compile only the currently opened source file
    // "${fileDirname}\\*.c", // Compile all C source files in the current folder
If you are building and debugging a C++ source file, use:
    "${file}", // Compile only the currently opened source file
    // "${fileDirname}\\*.cpp", // Compile all C++ source files in the current folder
Now save both files.
2.4 Run Hello World
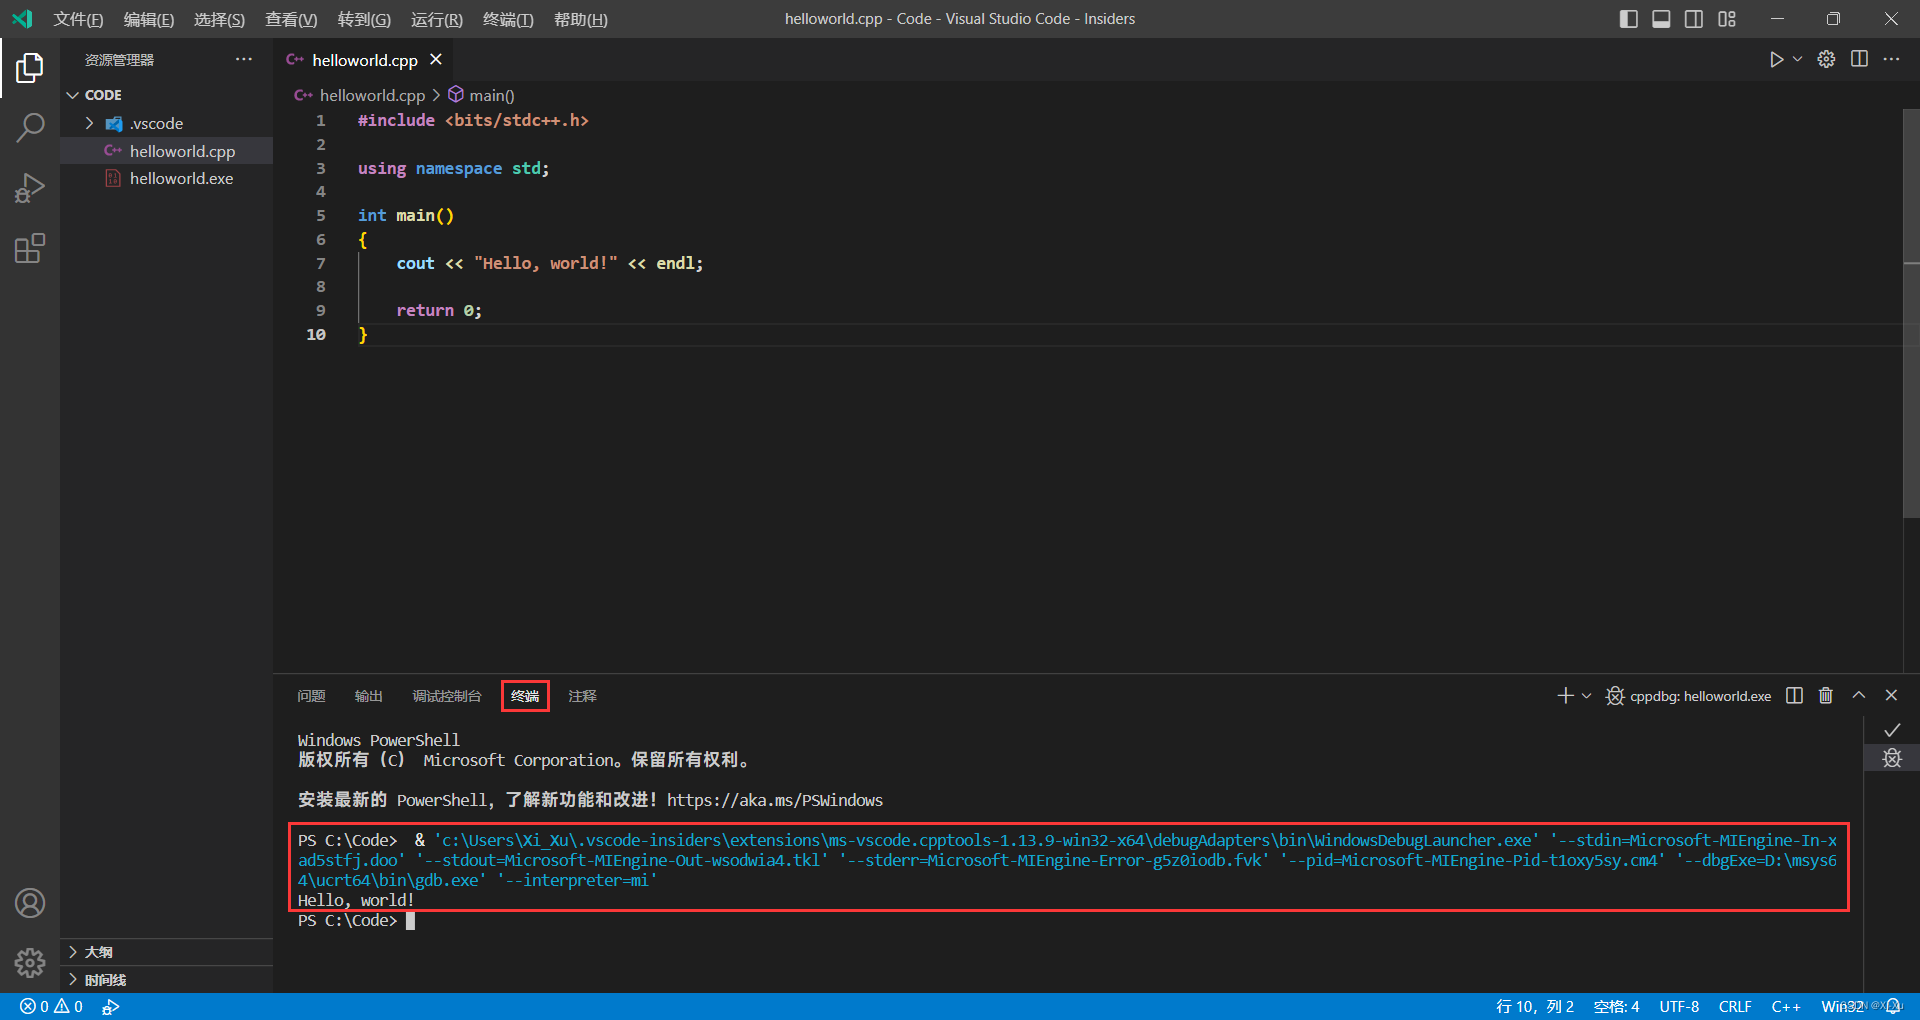
Return to helloworld.c or helloworld.cpp and press Ctrl+F5.
If compilation succeeds, the program output appears in the integrated terminal.
2.5 Debug Hello World
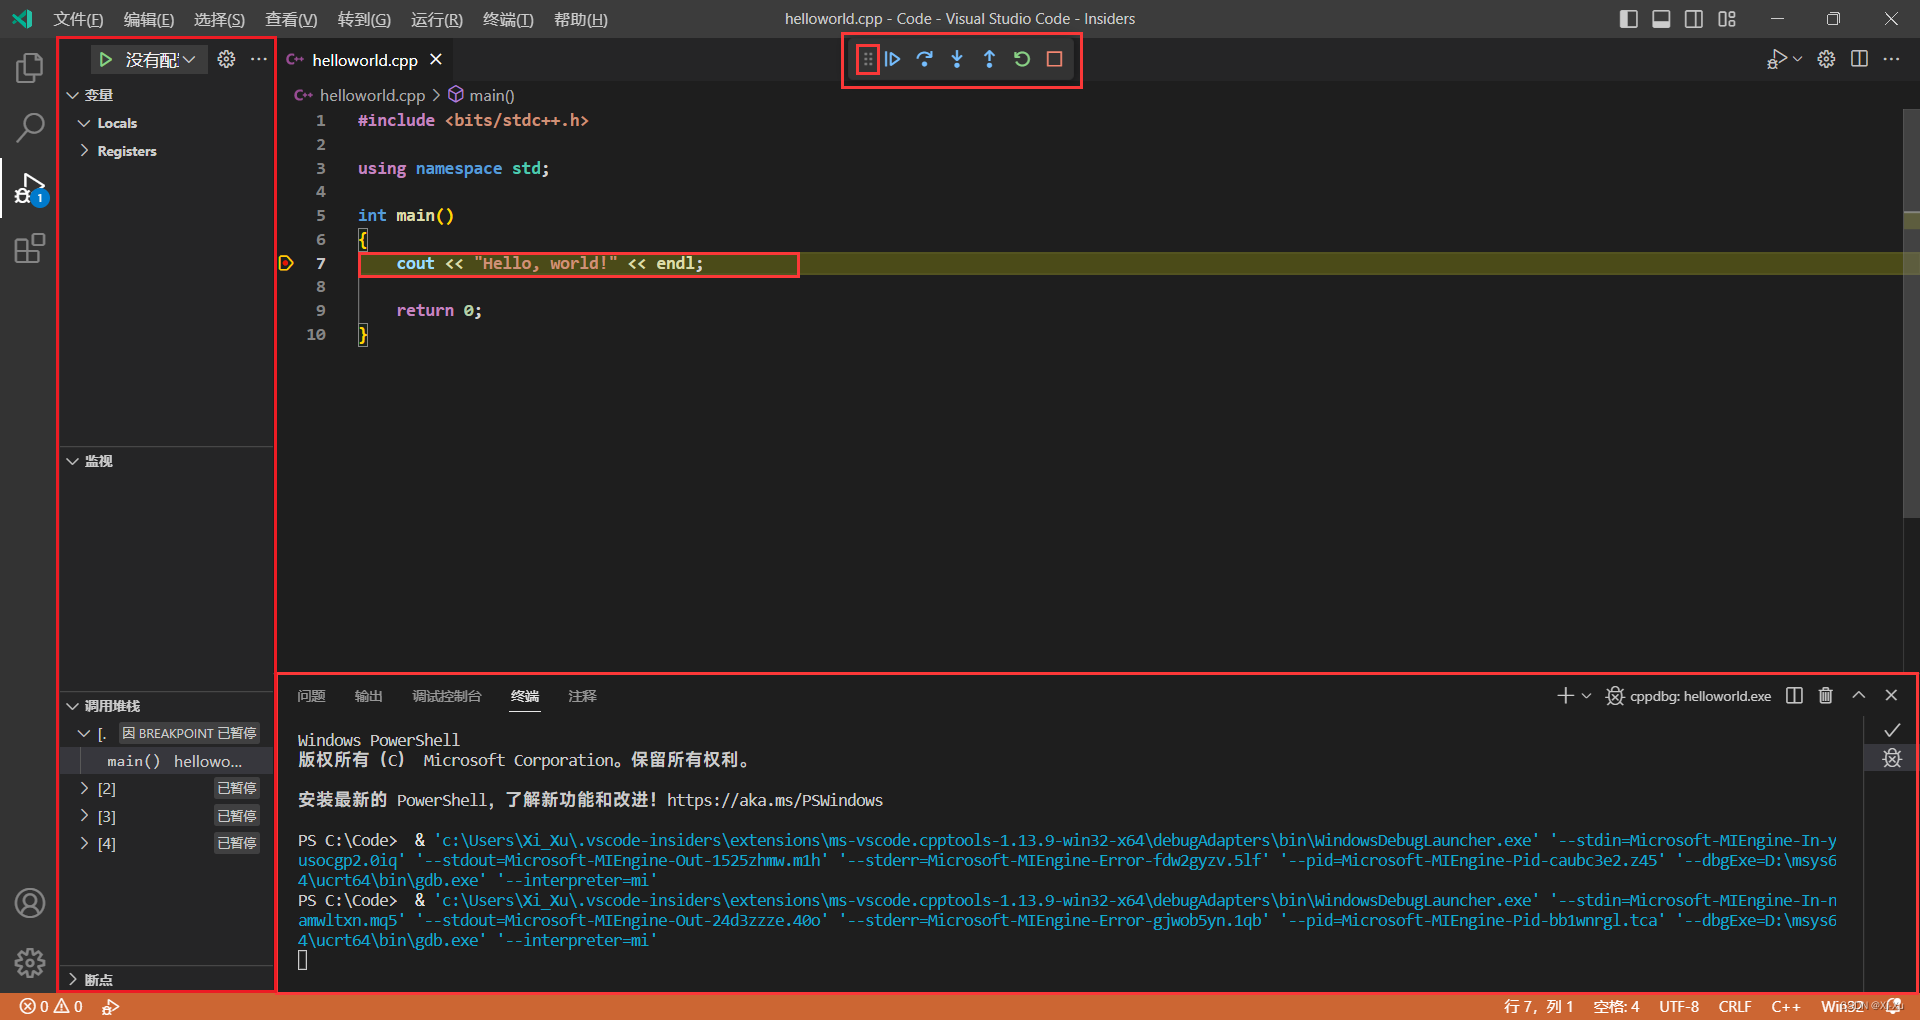
Click in the left margin of the editor to set a breakpoint, then press F5 to start debugging.
2.6 Explore the debugger
Before stepping through the code, notice the UI changes:
- The integrated terminal appears below the source editor.
- The line with your breakpoint is highlighted.
- The Run and Debug panel on the left shows debugging information.
- A floating debug toolbar appears near the top of the editor and can be dragged around.
2.7 Step through the code
At this point you are ready to step through the program.
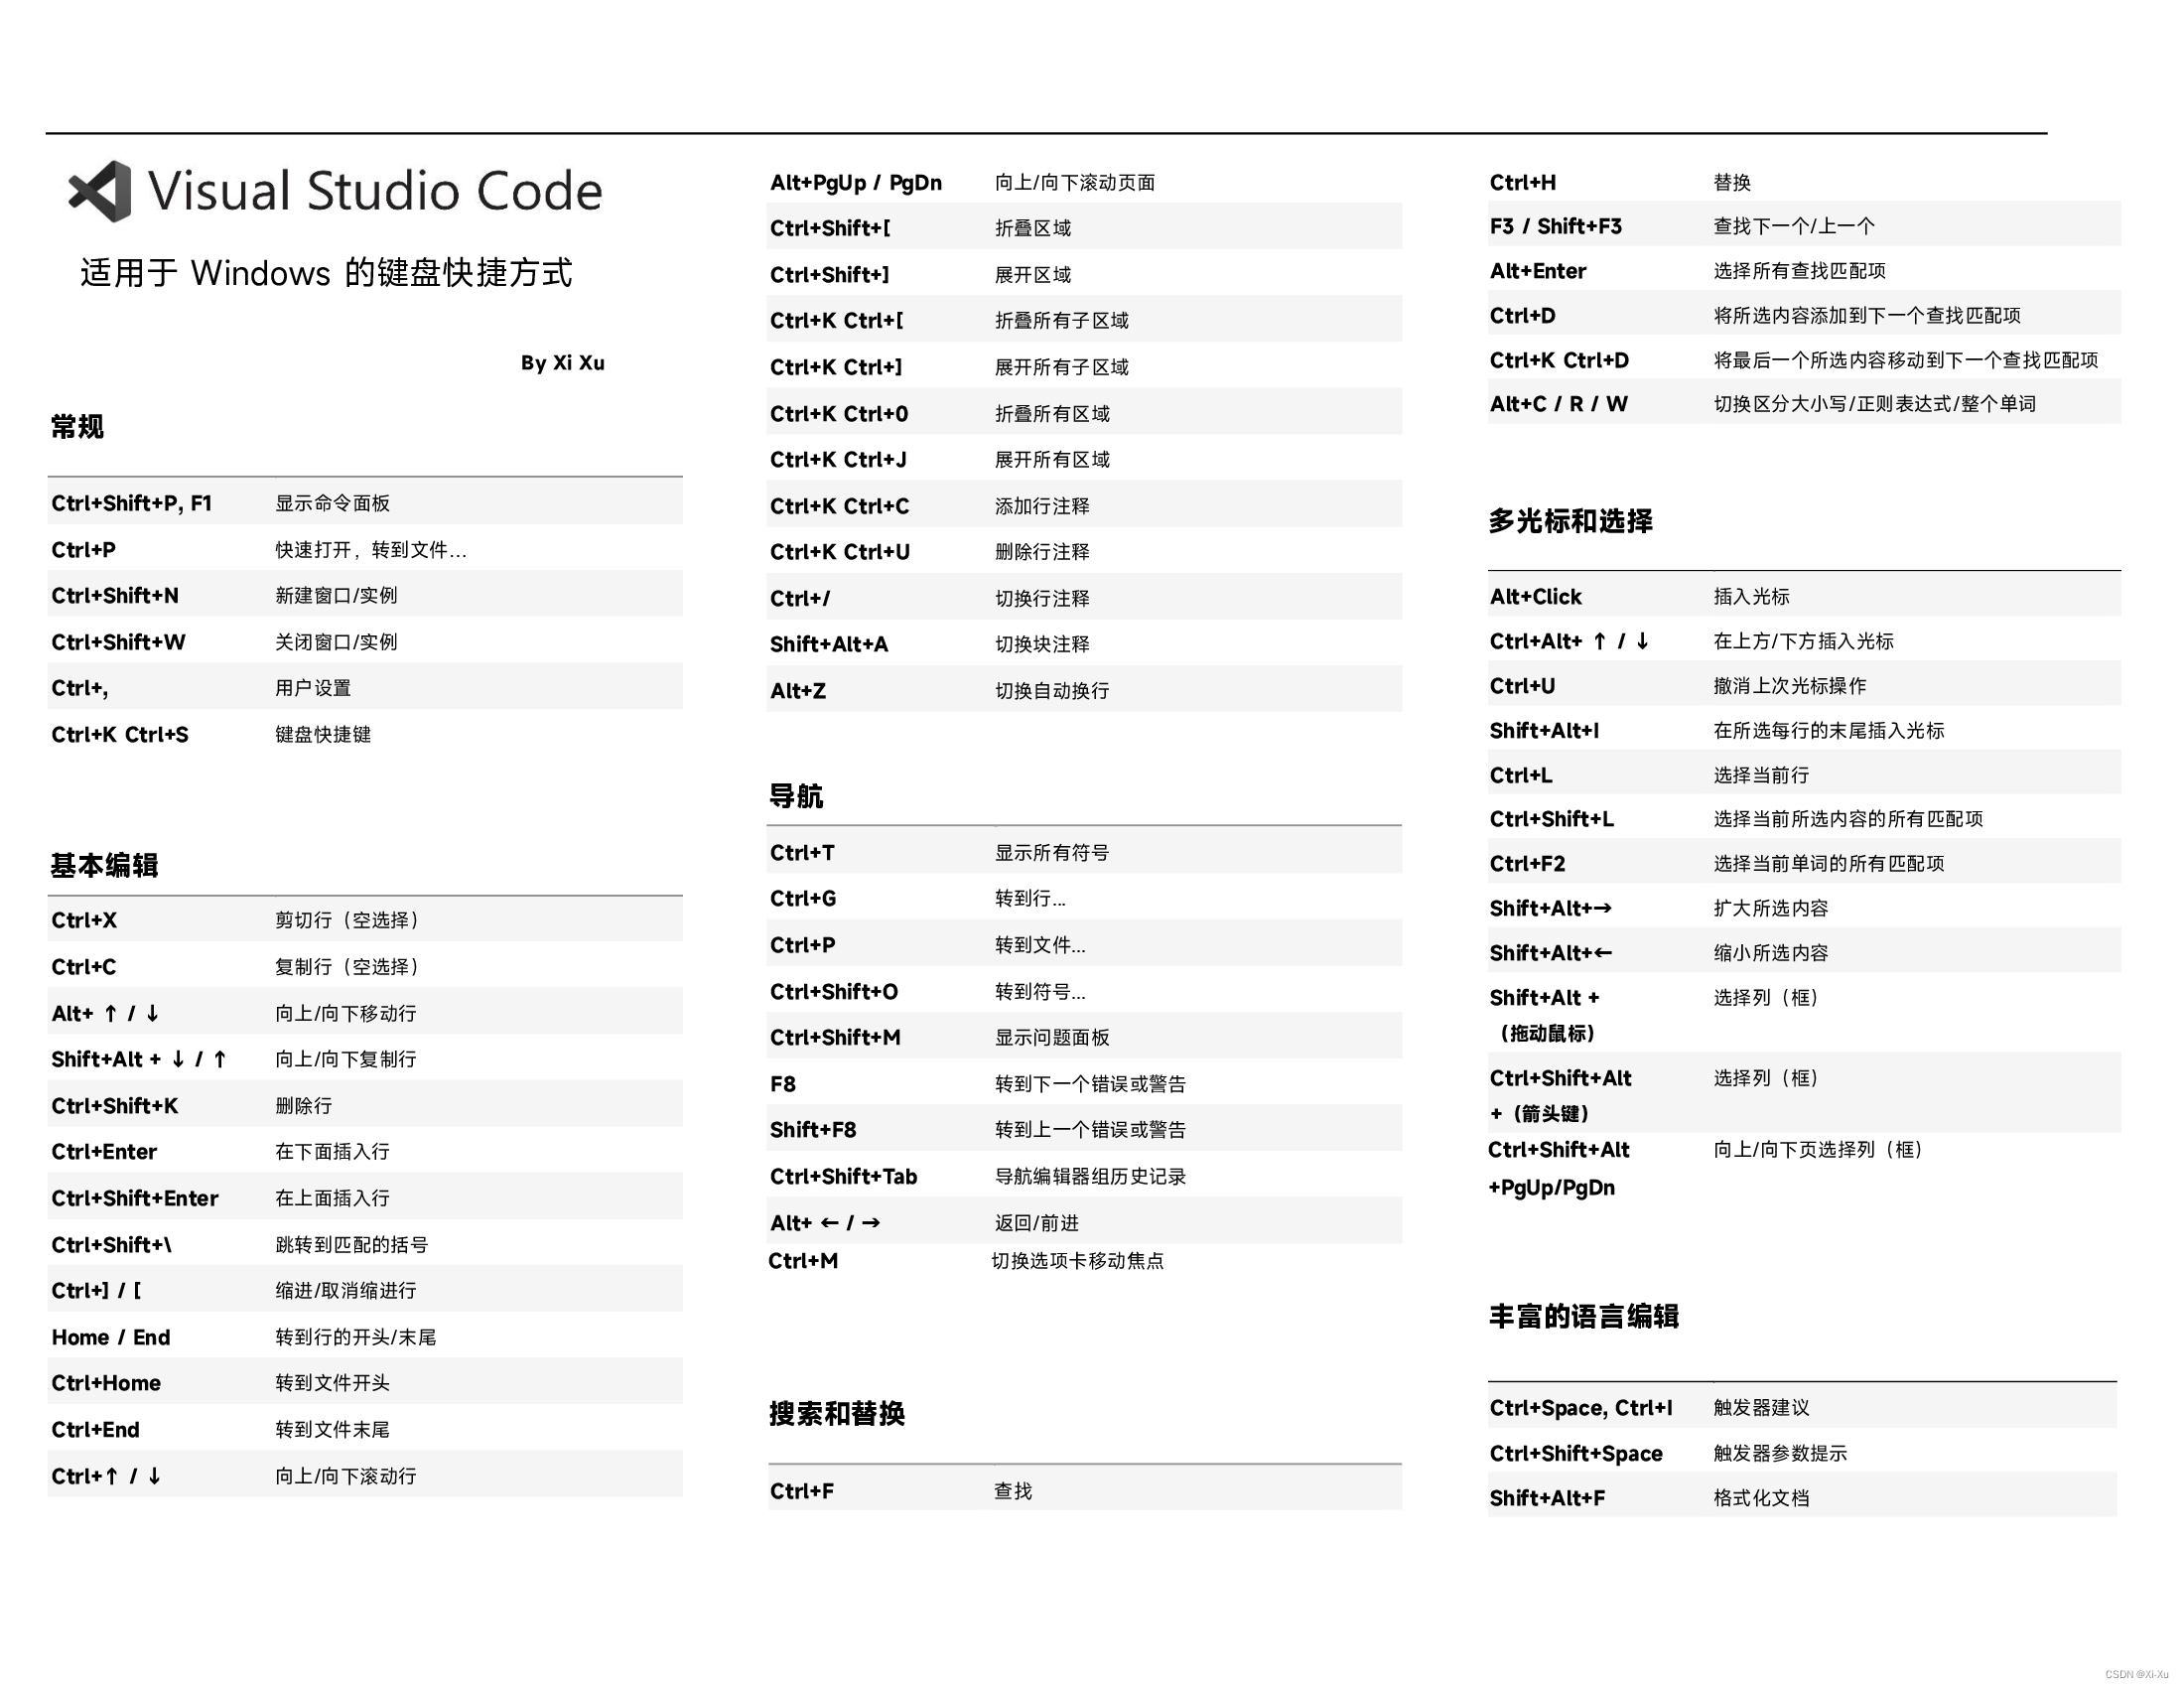
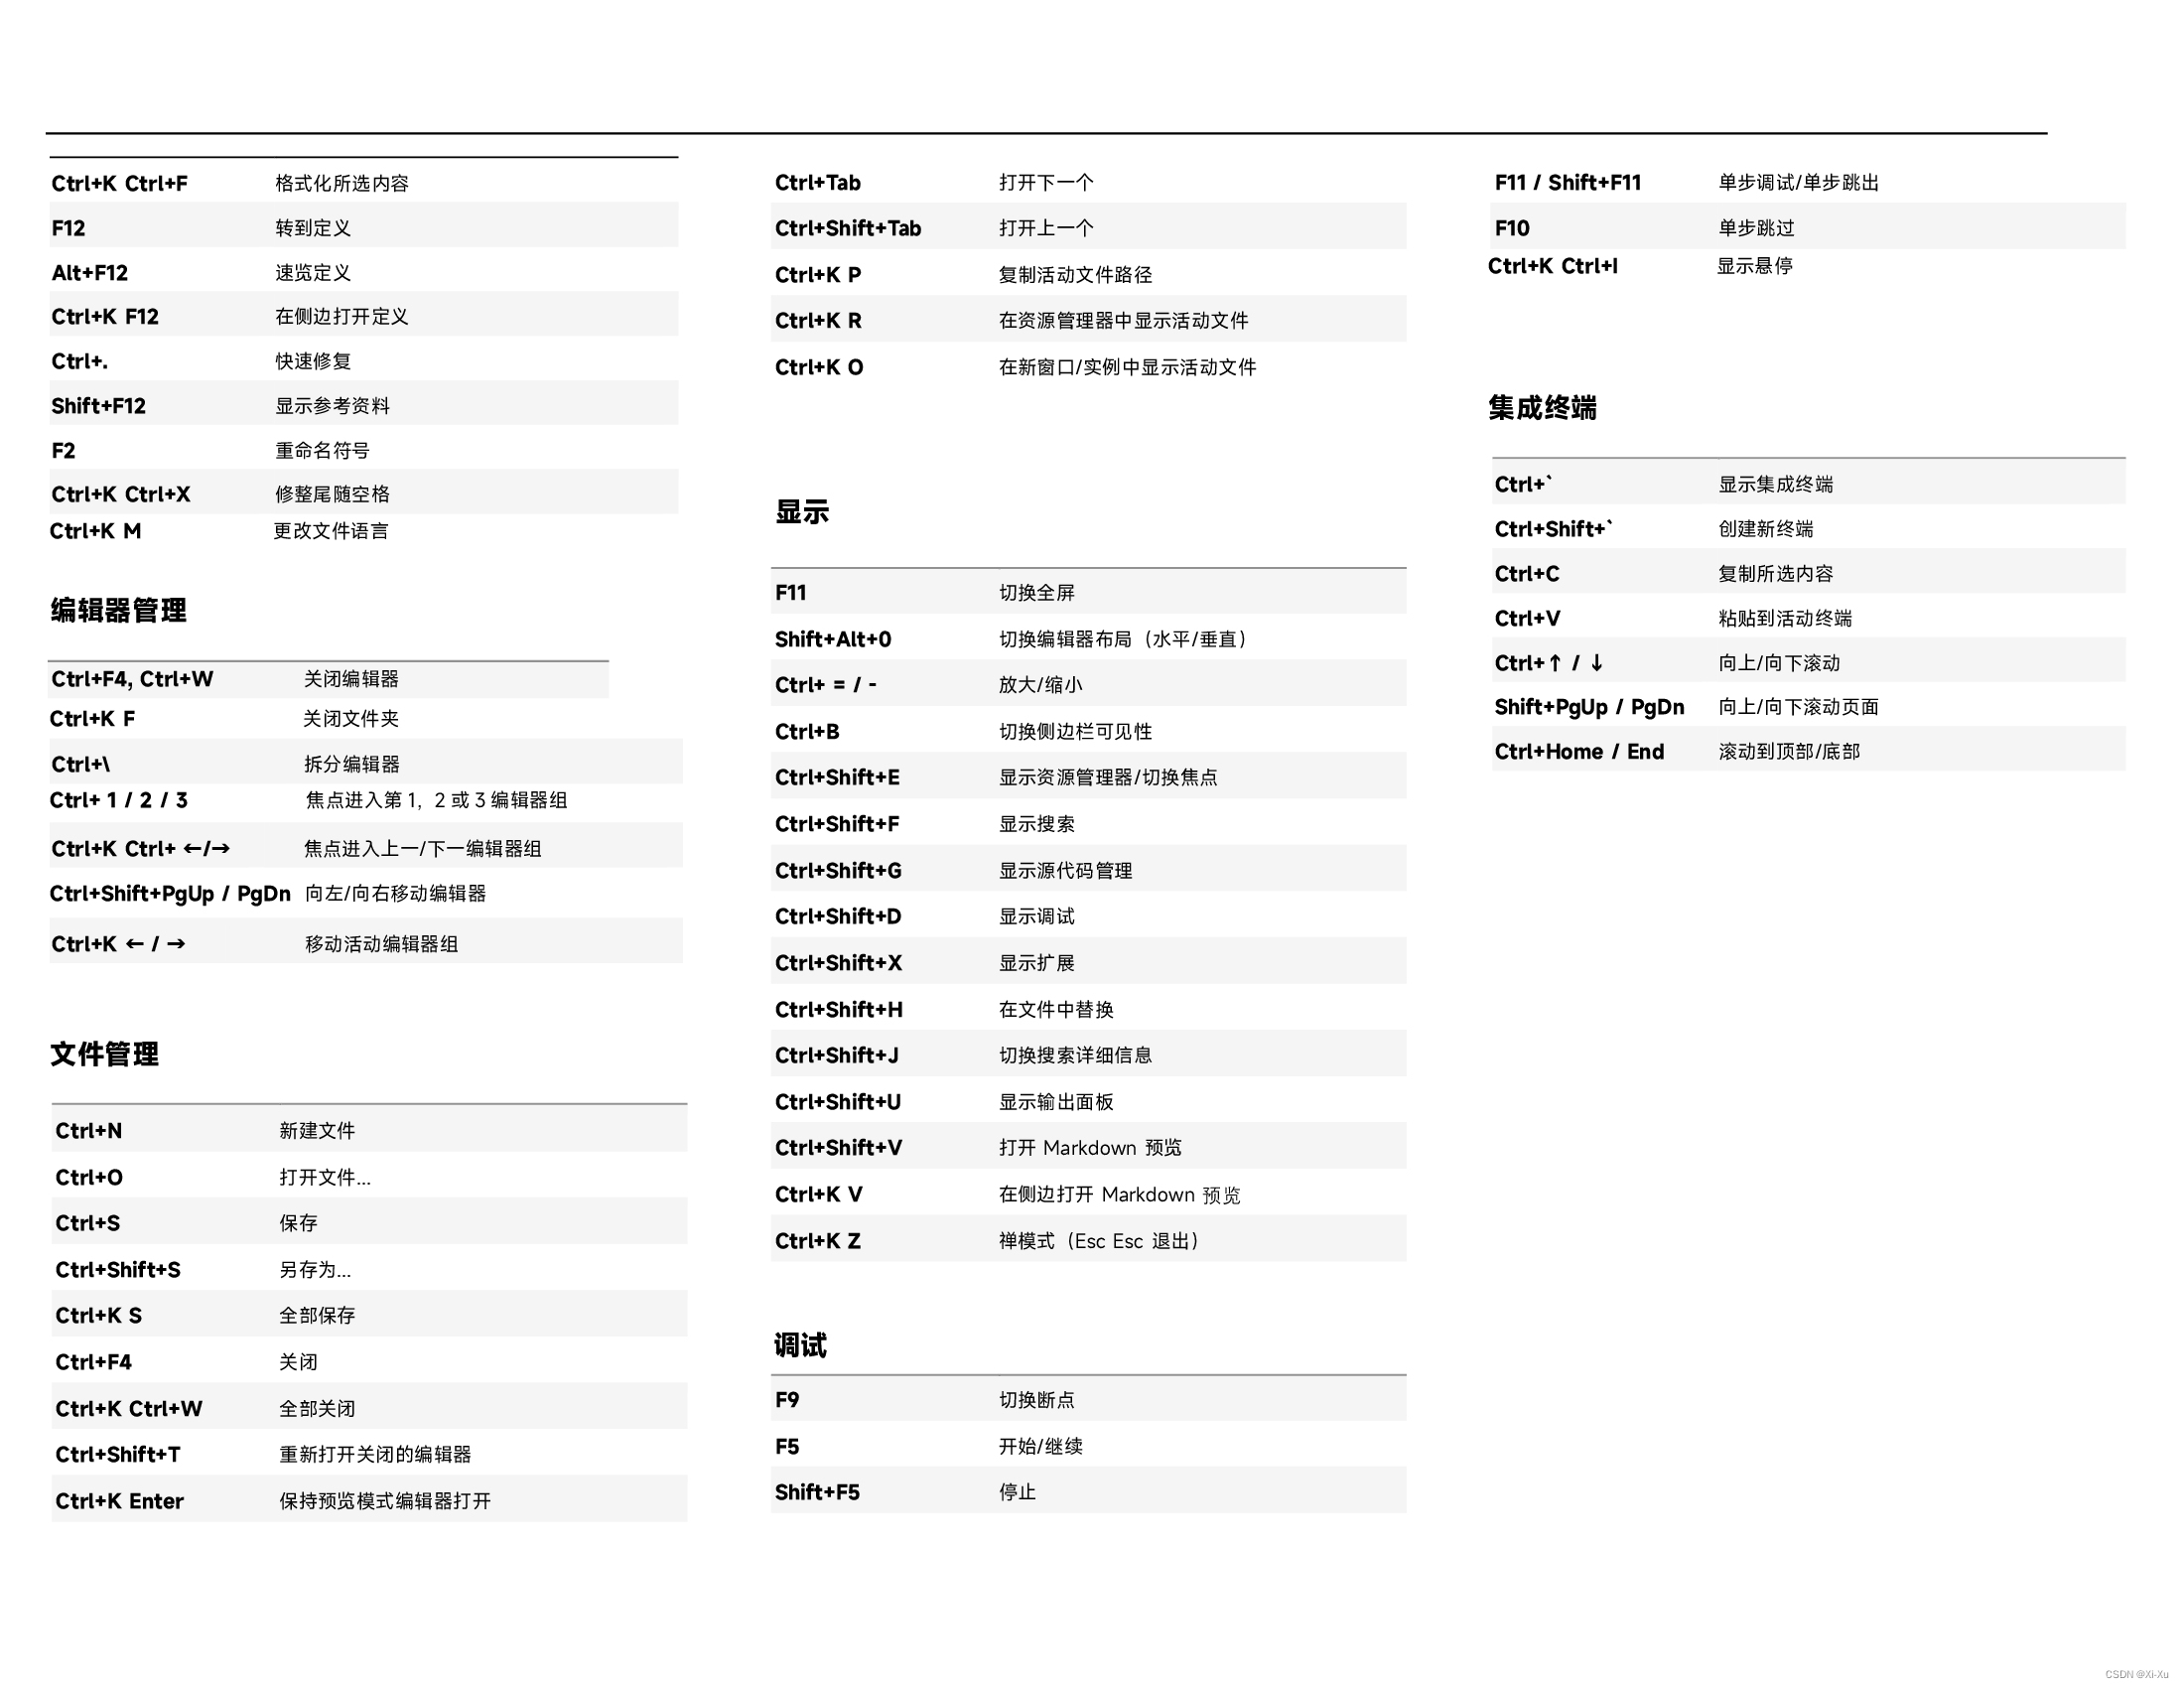
The exact stepping process is omitted here, but the keyboard shortcuts are shown in the appendix at the end of this article.
When you finish, you will see the final output in the integrated terminal together with some additional diagnostics from GDB.
2.8 Set watch expressions
Sometimes you want to track a variable while the program runs. You can do that with Watch expressions.
In the Watch window, click the plus sign and type the variable name.
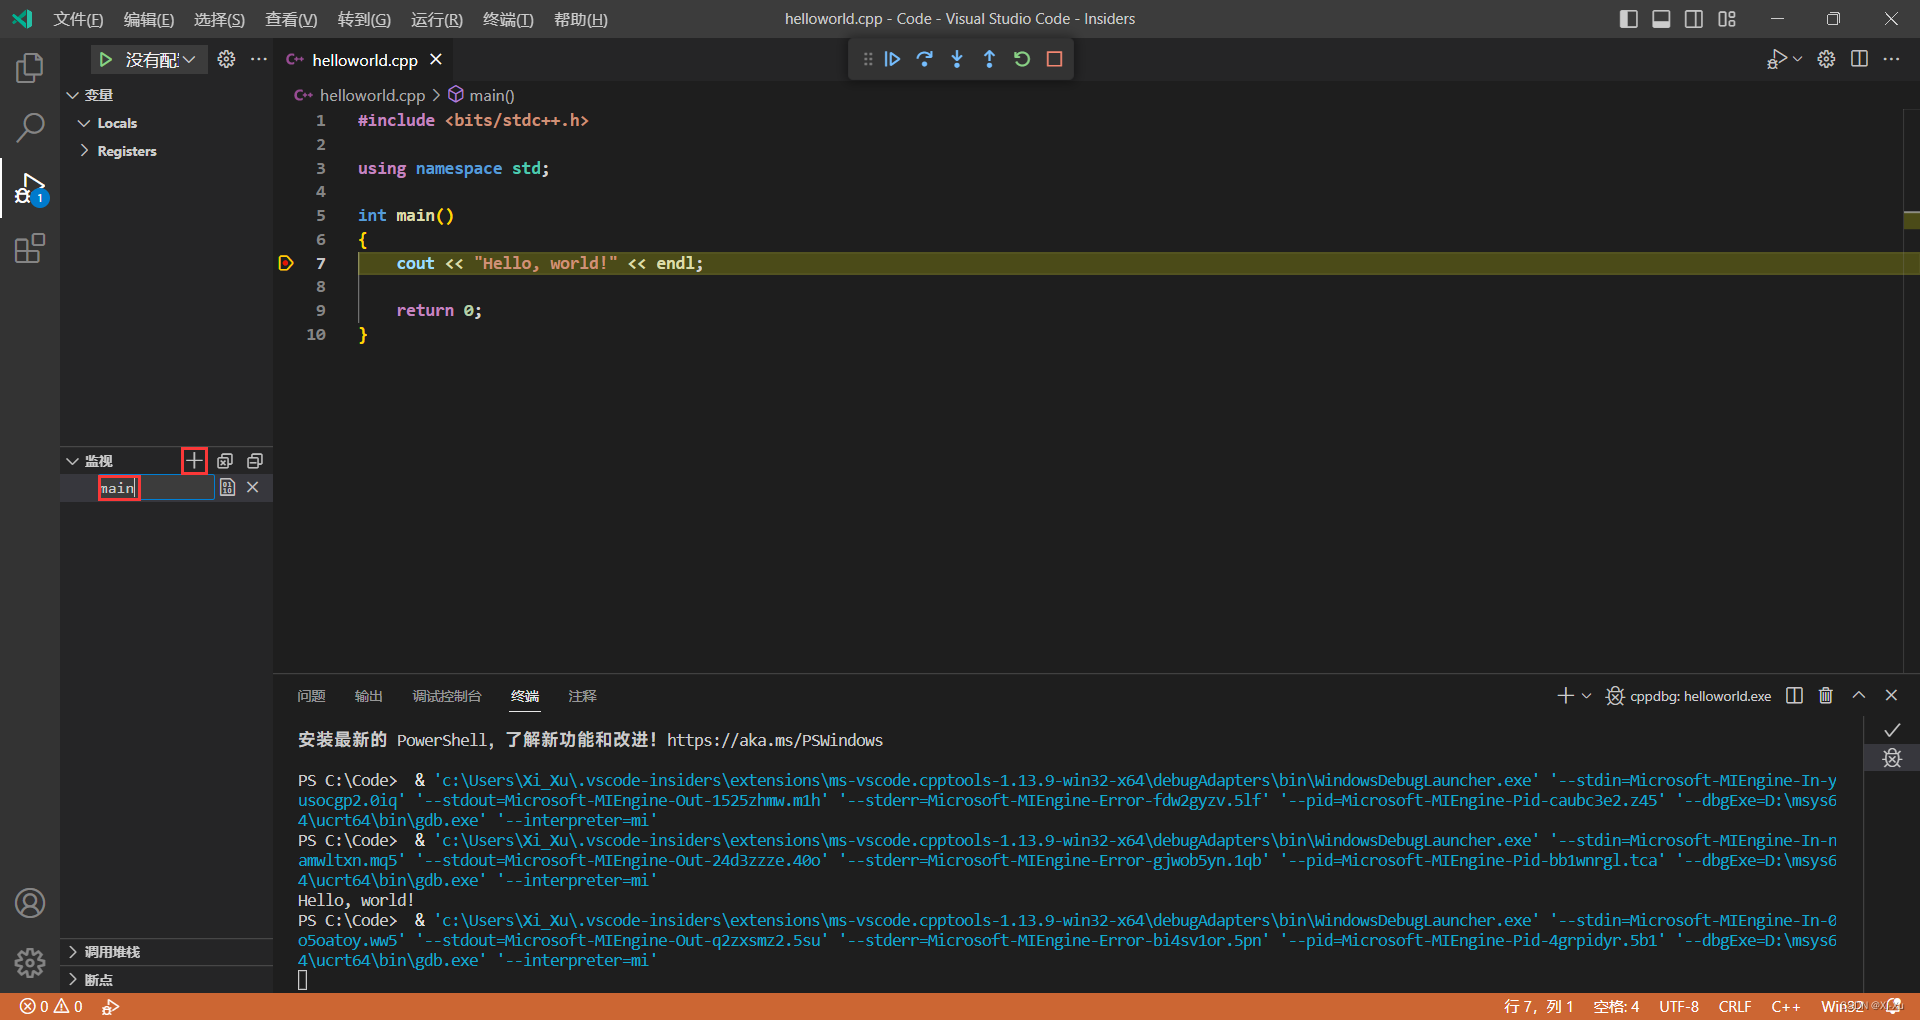
You can also hover the mouse over a variable at a breakpoint to inspect its current value quickly.
2.9 C/C++ configuration
If you want more control over the C/C++ extension, create a .vscode/c_cpp_properties.json file. This lets you configure the compiler path, include path, C/C++ standard, and more. The compilerPath value should match the compiler path used in tasks.json:
{
    "configurations": [
        {
            "name": "Win32",
            "includePath": [
                "${workspaceFolder}/**"
            ],
            "defines": [
                "_DEBUG",
                "UNICODE",
                "_UNICODE"
            ],
            "compilerPath": "C:/msys64/ucrt64/bin/gcc.exe",
            "cStandard": "gnu23",
            "cppStandard": "gnu++23",
            "intelliSenseMode": "windows-gcc-x64"
        }
    ],
    "version": 4
}
3. More
-
Recommended extensions:
- Code Runner
- Competitive Programming Helper (cph)
- Error Lens
- exe Runner
- GitHub Copilot
- GitHub Copilot Chat
- GitHub Copilot Labs
- Material Icon Theme
- Todo Tree
For each extension’s features, commands, and settings, check its own Overview page. You can also explore other excellent extensions on your own.
-
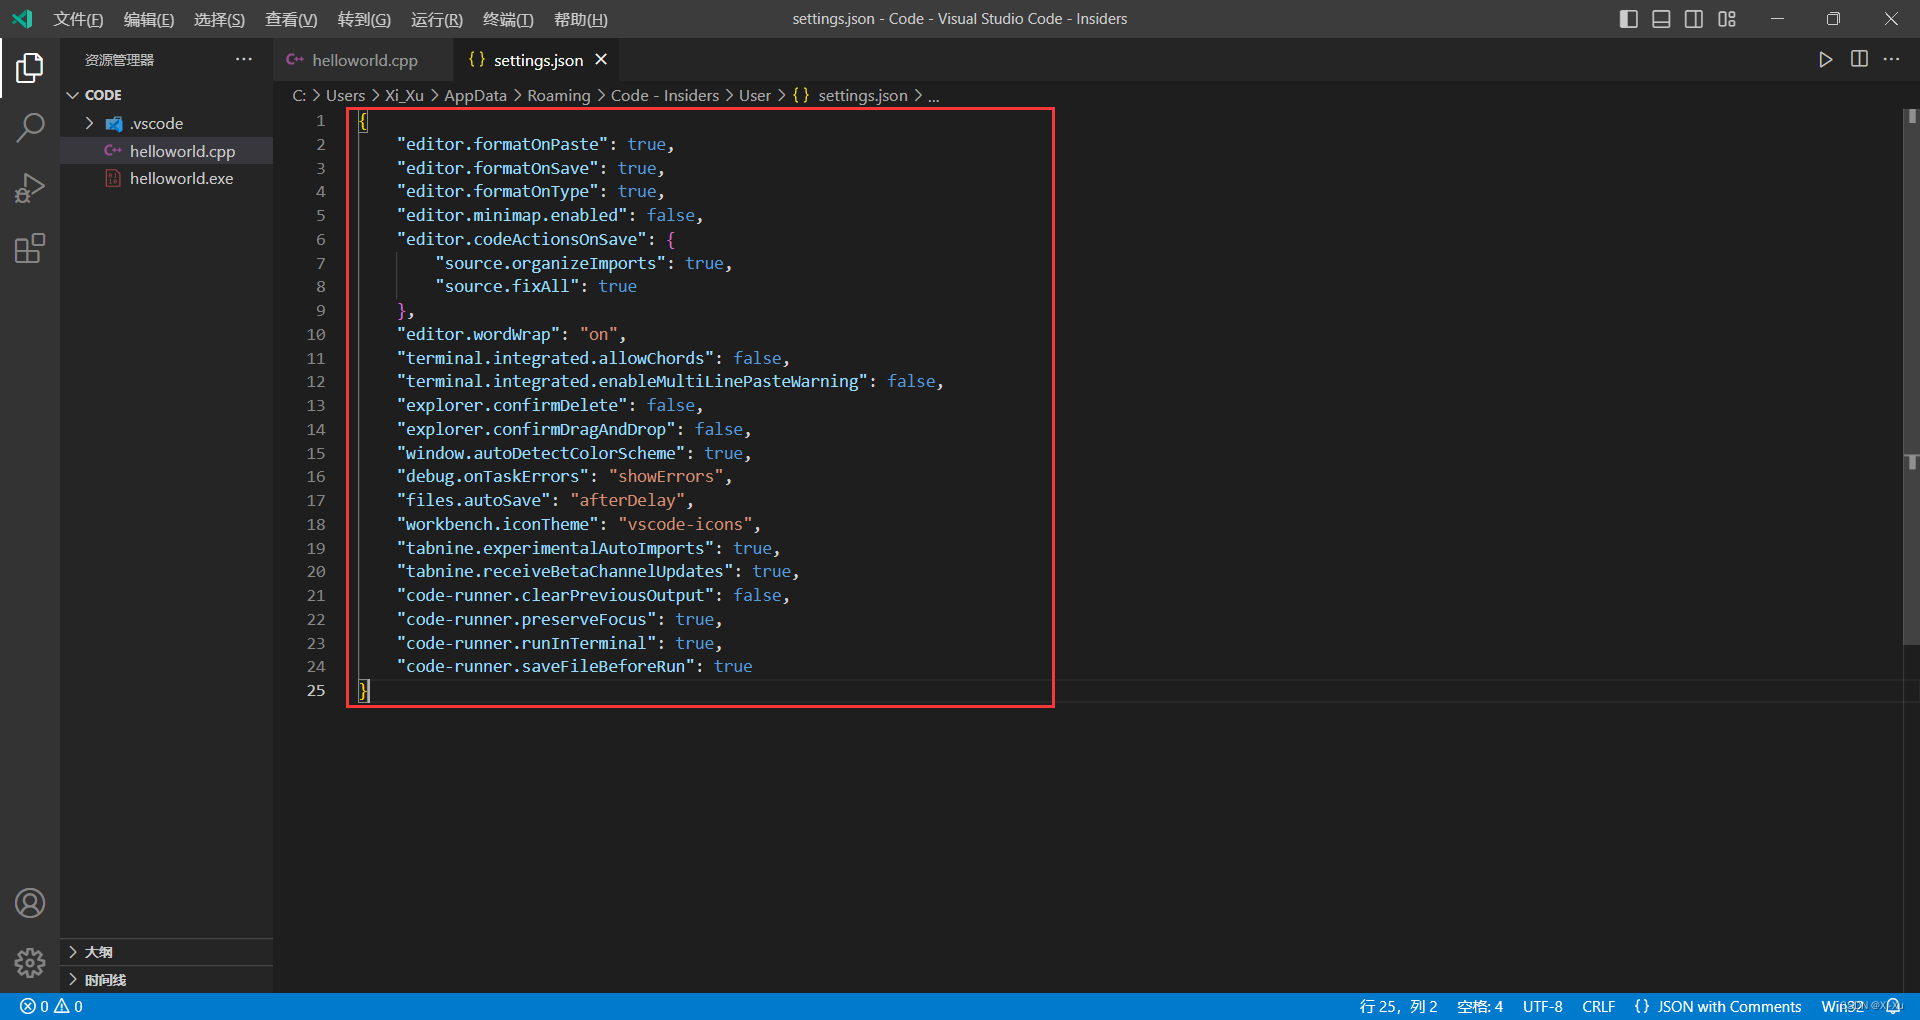
To make VS Code easier to use, create a user settings file at
%AppData%\Code\User\settings.jsonand add something like the following. It includes the Auto Save setting mentioned earlier. You can also refer to the author’s VS Code Settings.{ "debug.onTaskErrors": "showErrors", "editor.cursorSmoothCaretAnimation": "on", "editor.formatOnPaste": true, "editor.formatOnSave": true, "editor.formatOnType": true, "editor.minimap.enabled": false, "editor.mouseWheelZoom": true, "editor.smoothScrolling": true, "editor.stickyScroll.enabled": true, "editor.unicodeHighlight.allowedLocales": { "zh-hans": true, "zh-hant": true }, "editor.wordWrap": "on", "explorer.confirmDelete": false, "explorer.confirmDragAndDrop": false, "files.autoSave": "afterDelay", "files.autoGuessEncoding": true, "terminal.integrated.allowChords": false, "terminal.integrated.enableMultiLinePasteWarning": false, "terminal.integrated.smoothScrolling": true, "workbench.iconTheme": "material-icon-theme", "workbench.list.smoothScrolling": true, // Extensions "code-runner.runInTerminal": true, "code-runner.saveFileBeforeRun": true, "github.copilot.enable": { "*": true, "plaintext": true, "markdown": true, "scminput": true }, "github.copilot-labs.showBrushesLenses": true, "github.copilot-labs.showTestGenerationLenses": true }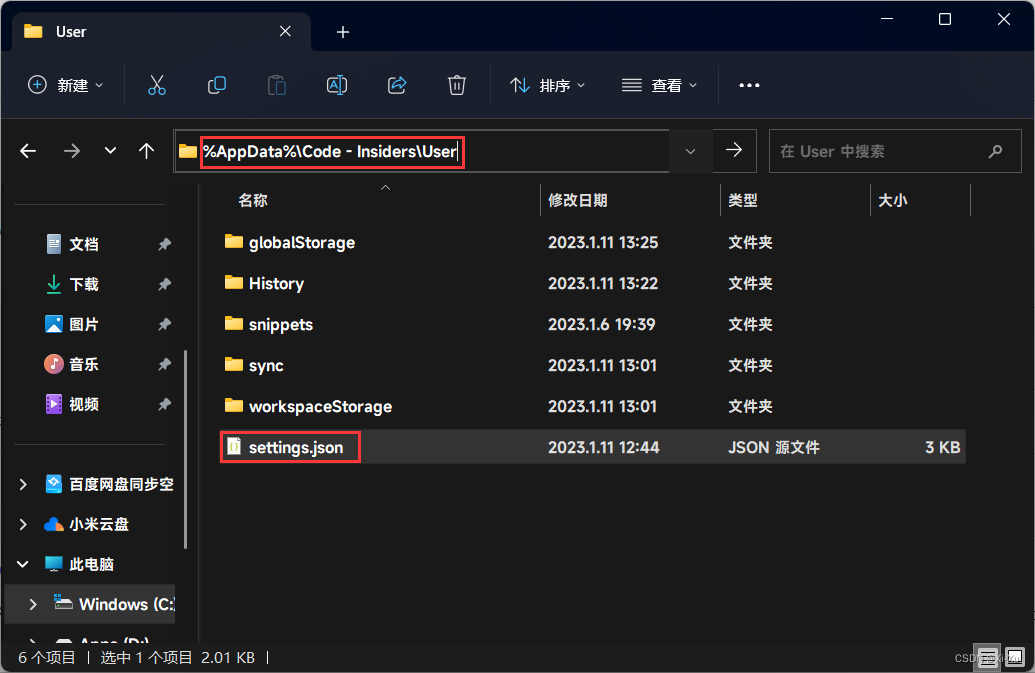
-
You can enable Settings Sync to keep your settings, per-platform keybindings, extensions, and more in sync across multiple machines.
-
If you want to delete generated
.exe,.o, and similar files after compiling, create adel.batfile in the workspace with the following content. Then right-click it in the Explorer and choose Run Code (which requires the Code Runner extension):del *.exe /q /s del a.out /q /s del *.o /q /s del tempCodeRunnerFile.c /q /s -
If you want a VS Code shortcut to open directly into your workspace folder, right-click the shortcut, choose Properties, and append the workspace path to Target, for example:
"C:\Program Files\Microsoft VS Code\Code.exe" "C:\Code\C++".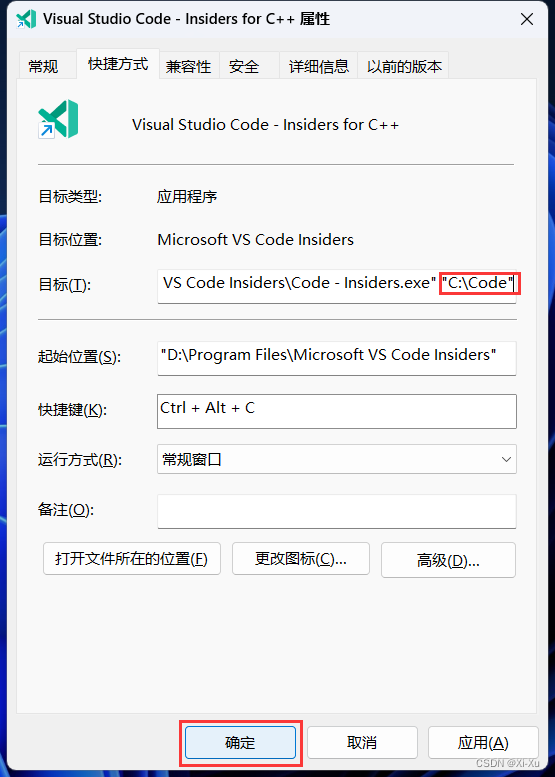
-
Avoid Chinese characters in source-file paths and in your Windows username, or you may run into encoding-related build issues.
-
If VS Code was already installed before you followed this tutorial, uninstall VS Code and remove all of its configuration folders, including
%AppData%\Codeand%USERPROFILE%\.vscode, before setting it up again according to this guide. -
This tutorial is Windows-based. Linux users can refer to Configure VS Code for C++ on Linux, macOS users can refer to Configure VS Code for C++ with Clang, and Windows users can also look at C++ with WSL in VS Code and Configure VS Code for Microsoft C++.
-
VS Code also offers VS Code Insiders, which is the build shown in the screenshots of this article. You can install it if you want access to the latest daily updates.
-
VS Code also has VS Code for the Web, which lets you use VS Code in a browser.
-
One of the most exciting areas today is AI in VS Code, especially the GitHub Copilot extension mentioned above. It can help you write code faster and more intelligently, learn from generated code, and even help configure your editor.
-
As one of the most popular code editors in the world, VS Code has many more capabilities worth exploring. The official documentation is the best place to continue.
-
This article only covers beginner-level VS Code plus C/C++ setup. If you want to go deeper, the official docs are still the best next step.
-
Because the text of this article keeps being updated, the screenshots and video may not always match the latest wording exactly. Please follow the written instructions first.
-
This tutorial may still have imperfections. If you find errors or have suggestions, feel free to contact the author through CONTACT on Xi Xu’s Home Page.
4. Appendix